
Use API Keys to Manage Deployments
After creating API keys in your EdgeCloud Dashboard, you can use them to call EdgeCloud APIs to manage your deployments programmatically.
If you are using Node.js, before calling any of the SDK functions mentioned below, please do:
- npm install the package.
npm install @thetalabs/theta-edgecloud - create X_API_KEY env var.
export X_API_KEY={your EdgeCloud API key} e.g. export X_API_KEY=cfmzcpur89ndgvinqp6730dcngmrv0yy - include the package in your source file.
const thetaEdgeCloud = require('@thetalabs/theta-edgecloud');
Deploy a Model
Before actually creating your deployment, you need to collect some information necessary to call the API. We will walk you through how to get them respectively:
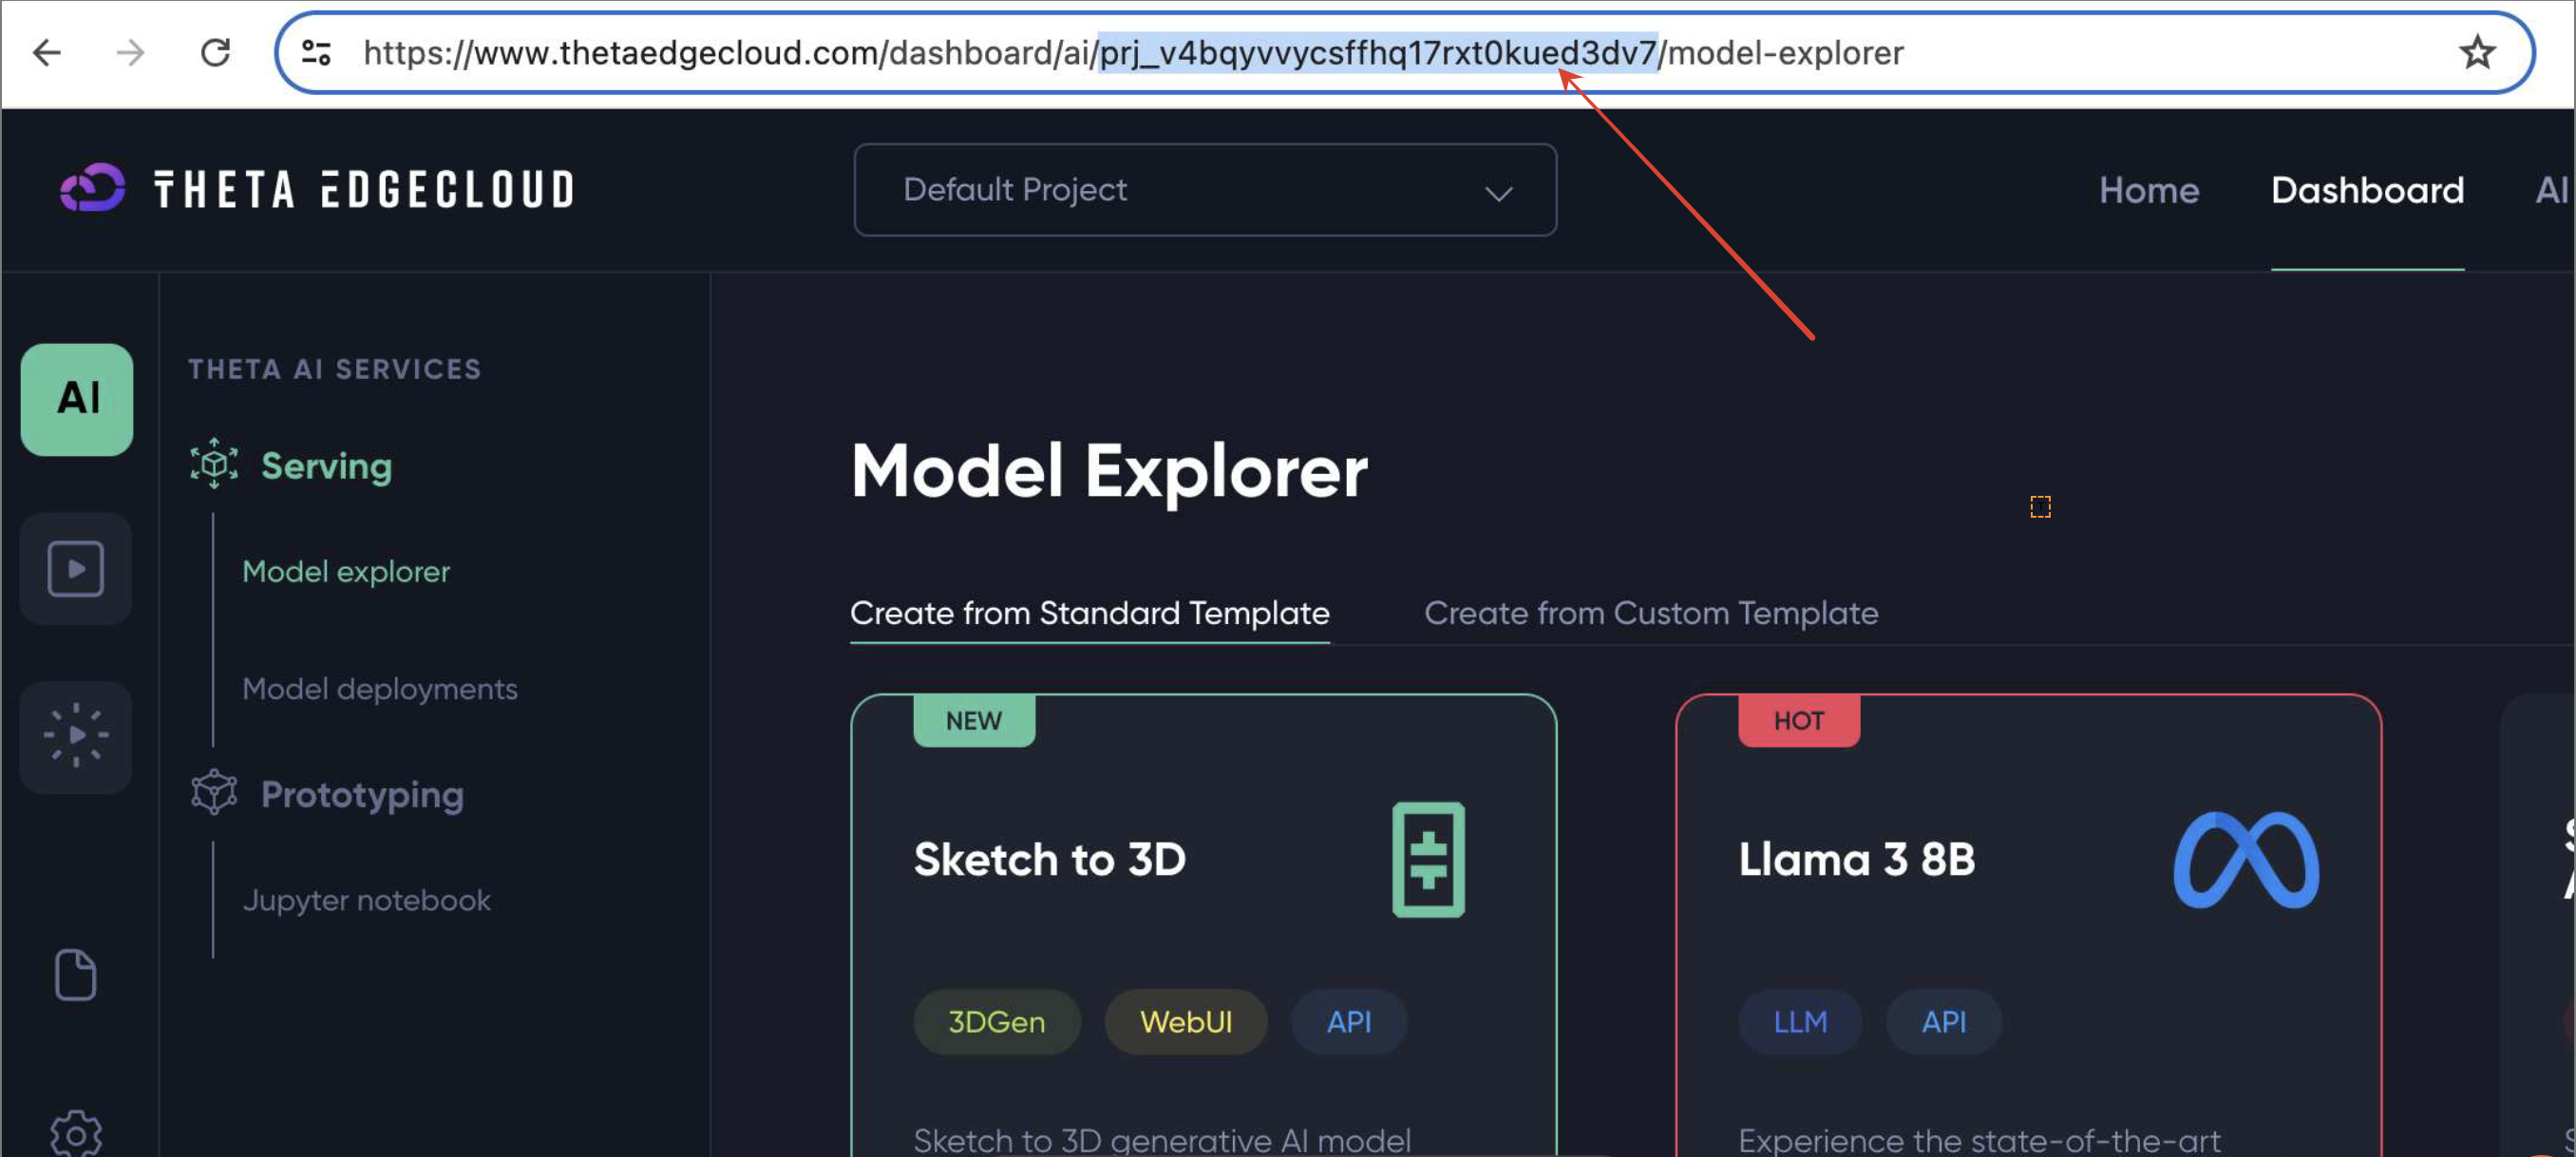
Find Project ID
Firstly, you need to tell EdgeCloud API in which project you want to create your deployment. To find your project id, look in the browser address bar when you are in your EdgeCloud dashboard's AI page:
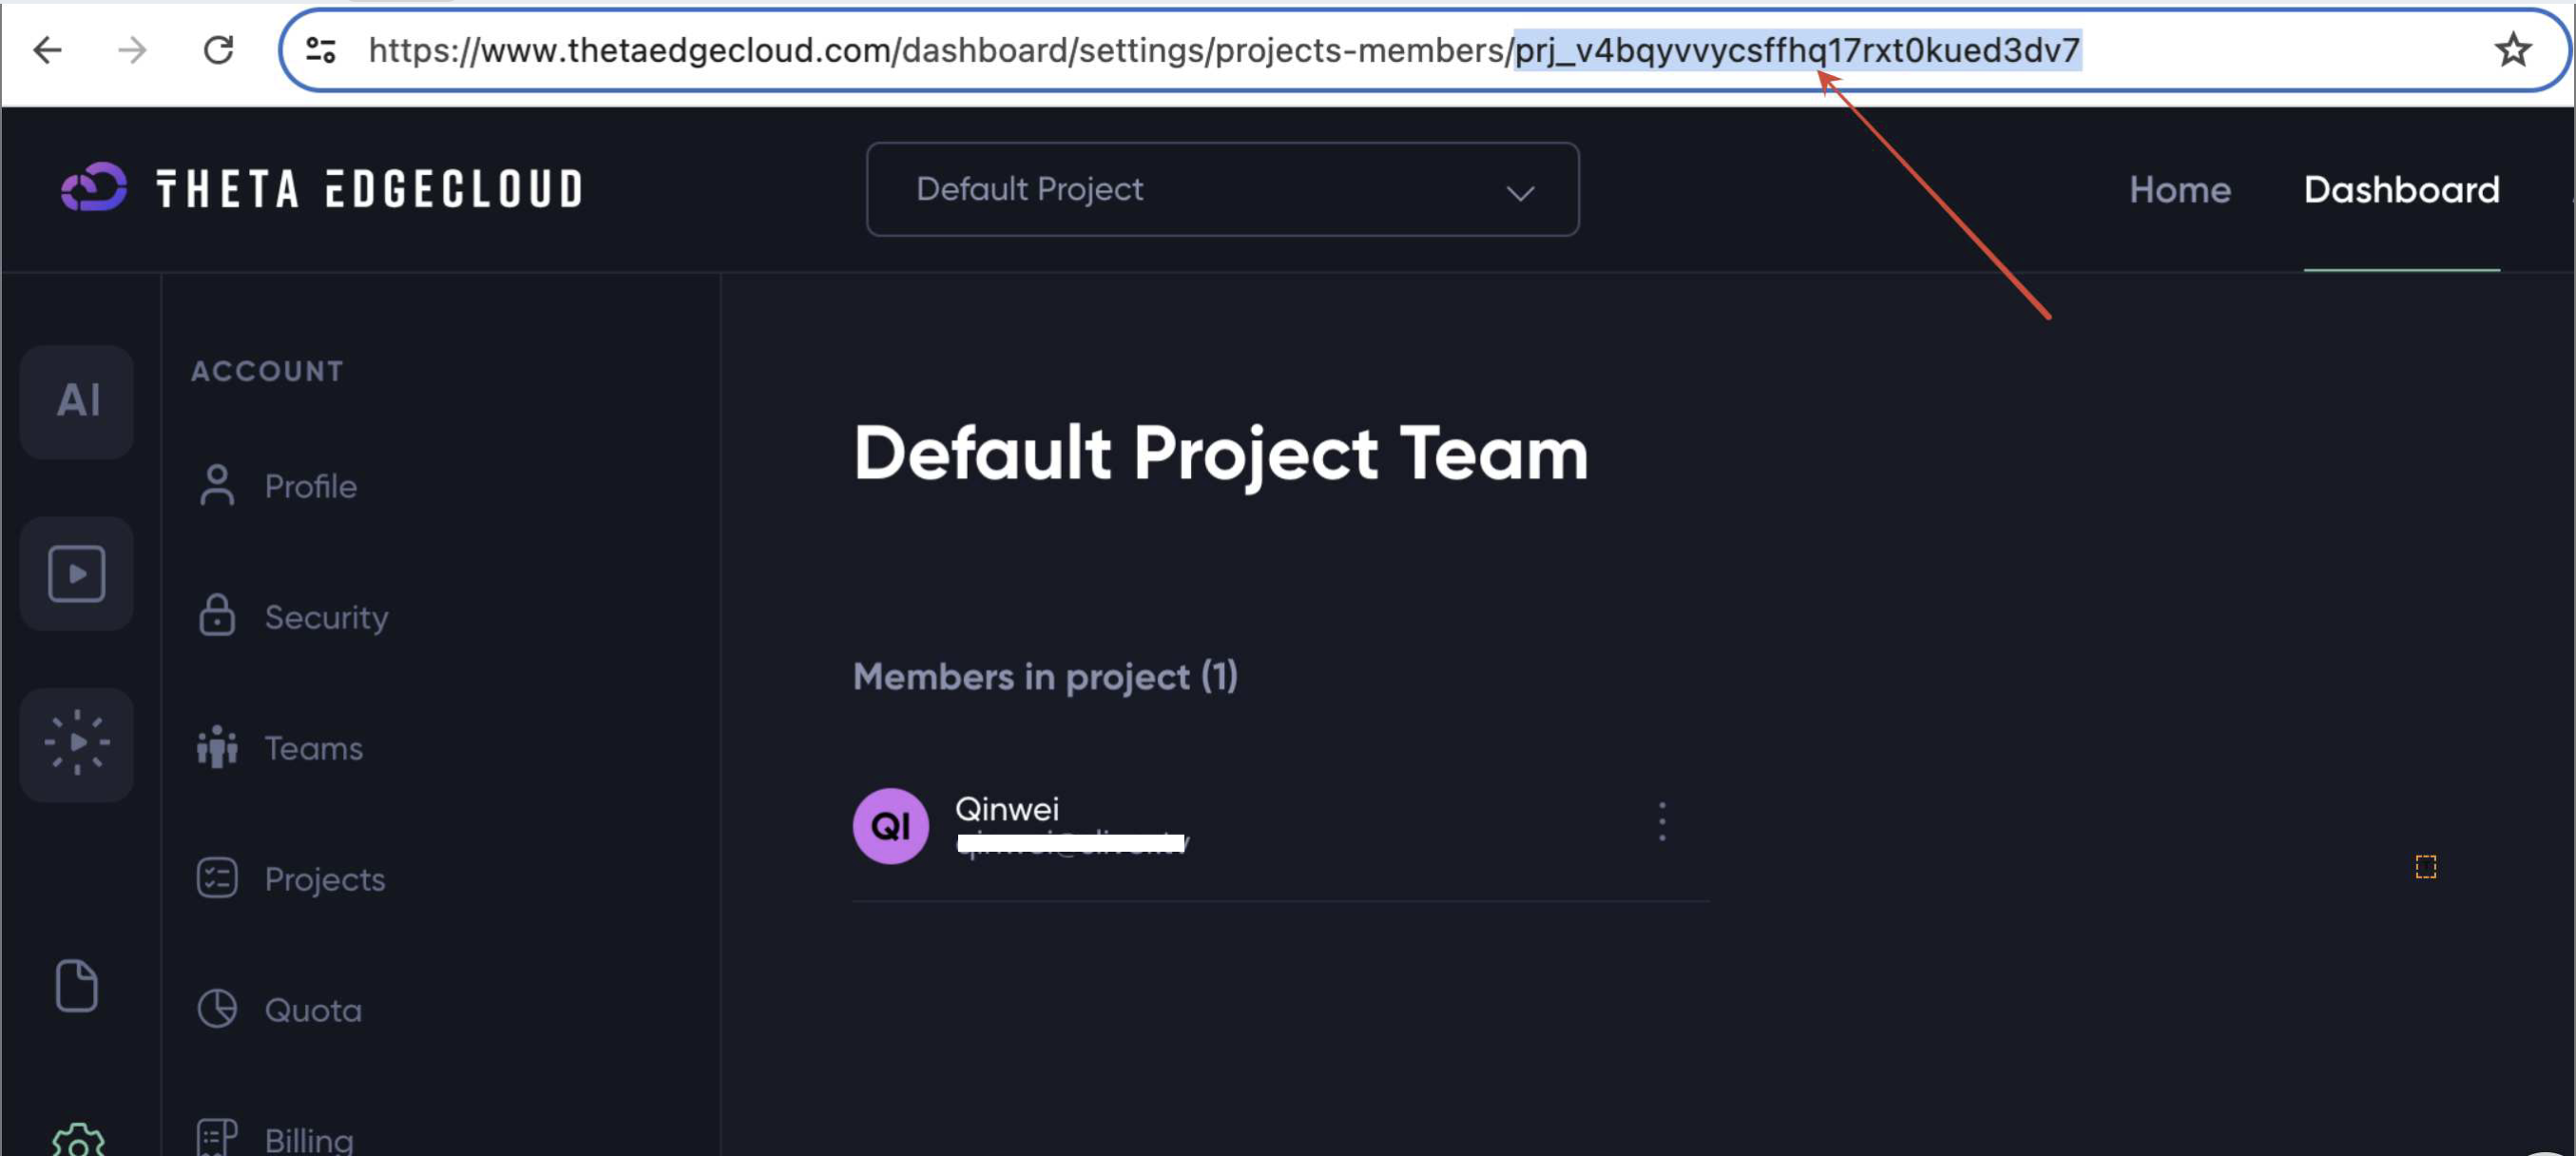
Or, you can find it when you select your project in the Settings->Projects page:
Find Deployment Template ID
Theta EdgeCloud AI deployments are all created from templates. In order to create a deployment, you need to specify the template id. Theta EdgeCloud provides a list of built-in standard deployment templates, and you can also create custom deployment templates specific to your own EdgeCloud projects. Here's how to list them respectively:
List Standard Templates
curl -H 'x-api-key: {EdgeCloud API key}' https://controller.thetaedgecloud.com/deployment_template/list_standard_templates?category=prototypingawait thetaEdgeCloud.template.listStandard('prototyping');The value for the category query parameter can be
- prototyping for dedicated deployments
- training for GPU Nodes
- serving. for Jupyter Notebooks
To obtain an EdgeCloud API key, please check out this document page.
List Your Project's Custom Templates
Note the API key in the header must be one from the corresponding project in the query param.
curl -H 'x-api-key: {EdgeCloud API key}' https://controller.thetaedgecloud.com/deployment_template/list_custom_templates?project_id={EdgeCloud project id}await thetaEdgeCloud.template.listCustom({EdgeCloud project id});Using the project id in the above screenshots (and a mock API key) as an example, the command would look like:
curl -H 'x-api-key: abc2iiz9t1mkdpv27zr2jf8mp01egxyz' https://controller.thetaedgecloud.com/deployment_template/list_custom_templates?project_id=prj_v4bqyvvycsffhq17rxt0kued3dv7await thetaEdgeCloud.template.listCustom('prj_v4bqyvvycsffhq17rxt0kued3dv7');Either way, the response would look like:
{
   "status":"success",
   "body":{
      "total_count":"1",
      "templates":[
         {
            "id":"img_11d40kefk5jpauj8pk59mb52dzbe",  // <----------
            "name":"Jupyter Notebook",
            "description":null,
            "tags":[
               "Text2image"
            ],
            "category":"prototyping",
            "project_id":null,
            "container_images":[
               "jupyter/base-notebook:latest"
            ],
            "suggested_vms":[
               "vm_gt1",      // <----------
            ],
            "container_port":8888,
            "container_args":null,
            "env_vars":null,
            "require_env_vars":false,
            "rank":300,
            "icon_url":null,
            "create_time":"2024-04-12T03:55:04.879Z"
         },
        ...
      ],
      "page":0,
      "number":10
   }
}
Choose a template with which you want to create the new deployment, and use its id (in the above example, img_11d40kefk5jpauj8pk59mb52dzbe) when launching deployment .
Find a Machine Type
In addition, you also need to specify what machine type you want to launch the deployment with.
If you chose a standard template above, the template JSON object should contain a suggested_vms field, which suggests the "lowest" machine type required for the container image specified in that template. You can just use its value, in the above example, vm_gt1.
If you want to use a more "powerful" machine type, or you chose a custom template which usually doesn't come along with suggested_vms, you may want to list all available machine types in Theta EdgeCloud and select one based on the hardware resources configurations and prices:
curl -H 'x-api-key: {EdgeCloud API key}' https://api.thetaedgecloud.com/resource/vm/listawait thetaEdgeCloud.resource.listMachineTypes();The response would look like:
{
   "status":"success",
   "body":{
      "vms":[
         {
            "id":"vm_c1",
            "name":"C1",
            "description":null,
            "resources":{
               "cpu":"2000",
               "mem":"2048",
               "storage":"32"
            },
            "price_hour":"5"
         },
         {
            "id":"vm_c2",
            "name":"C2",
            "description":null,
            "resources":{
               "cpu":"8000",
               "mem":"16384",
               "storage":"256"
            },
            "price_hour":"10"
         },
         {
            "id":"vm_gt1",      // <----------
            "name":"GT1",
            "description":null,
            "resources":{
               "cpu":"2000",
               "mem":"8192",
               "storage":"128",
               "gpu":"1",
               "gpu model":"NVIDIA T4"
            },
            "price_hour":"20"
         },
         {
            "id":"vm_gt2",
            "name":"GT2",
            "description":null,
            "resources":{
               "cpu":"8000",
               "mem":"16384",
               "storage":"256",
               "gpu":"2",
               "gpu model":"NVIDIA T4"
            },
            "price_hour":"40"
         },
         {
            "id":"vm_gv1",
            "name":"GV1",
            "description":null,
            "resources":{
               "cpu":"4000",
               "mem":"16384",
               "storage":"256",
               "gpu":"1",
               "gpu model":"NVIDIA V100"
            },
            "price_hour":"99"
         },
         {
            "id":"vm_gv2",
            "name":"GV2",
            "description":null,
            "resources":{
               "cpu":"8000",
               "mem":"32768",
               "storage":"512",
               "gpu":"2",
               "gpu model":"NVIDIA V100"
            },
            "price_hour":"198"
         },
         {
            "id":"vm_ga1",
            "name":"GA1",
            "description":null,
            "resources":{
               "cpu":"10000",
               "mem":"81920",
               "storage":"256",
               "gpu":"1",
               "gpu model":"NVIDIA A100"
            },
            "price_hour":"199"
         },
         {
            "id":"vm_ga2",
            "name":"GA2",
            "description":null,
            "resources":{
               "cpu":"20000",
               "mem":"163840",
               "storage":"1024",
               "gpu":"2",
               "gpu model":"NVIDIA A100"
            },
            "price_hour":"398"
         }
      ]
   }
}
Choose a machine type with which you want to create the new deployment, and use its id (e.g. let's select vm_gt1) when launching deployment .
Launch Deployment
With all the above information ready in hand, you can use the following cURL command to actually deploy an AI model. Replace payload values as needed in the POST body.
Use the template id, machine type id and project id obtained in the previous steps for the deployment_template_id, vm_id and project_id fields in the payload respectively.
curl -X POST -H "Content-Type: application/json" -H 'x-api-key: {EdgeCloud API key}' https://controller.thetaedgecloud.com/deployment
-d '{
   "project_id": "prj_v4bqyvvycsffhq17rxt0kued3dv7",
   "deployment_template_id": "img_11d40kefk5jpauj8pk59mb52dzbe",
   "container_image": "thetalabsofficial/jupyter-pytorch-cuda-full",
   "auth_username": "johnsmith",
   "auth_password": "securepw",
   "vm_id":"vm_c1",
   "min_replicas": 1,
   "max_replicas": 1,
   "password": "supersecret",
   "annotations": {"nickname": "my-notebook"}
}'
await thetaEdgeCloud.deployment.create({
"project_id": "prj_v4bqyvvycsffhq17rxt0kued3dv7",
"deployment_template_id": "img_11d40kefk5jpauj8pk59mb52dzbe",
"container_image": "jupyter/base-notebook:latest",
"vm_id":"vm_gt1",
"min_replicas": 1,
"max_replicas": 1,
"password": "supersecret",
"annotations": {"nickname": "my-notebook"}
});Here's a list of all available parameters you can specify in the payload (* = required):
- project_id *: The project in which you want to create your deployment.
- deployment_template_id *: Template for the deployment, see above
- container_image: If the above deployment template's container_images property has more than one values, you need to specify which container image to use here. Otherwise, you don't need to specify this param.
- vm_id *: machine type id, see above
- min_replicas *: min number of replicas
- max_replicas: max number of replicas
- env_vars: string to string mapping to add to container environment variables.
- annotations: string to string mapping as annotations. You can put an easy to remember nickname for the deployment, e.g.
annotations: {"nickname": "my-notebook"}. The dashboard will display the nickname in the "Name" column on the "Model deployments" and the "Jupyter notebook" page. - auth_username: username of http basic auth of the inference endpoint (optional).
- auth_password: password of http basic auth of the inference endpoint (optional).
- registry_username & registry_password: credentials for using private container image. When provided, registry_password will be kept in a secure secret manager by Theta.
- password: The password required to set up for the Jupyter instance only.
If successful, it would return information about the model you just deployed, e.g. its inference endpoint.
{
   "status":"success",
   "body":{
      "ID":8771,
      "Endpoint":"https://jupyternotebng4rkqgf-ivxzc7hfsy4mmmpfc3c58xmhjhz6.tec-s1.onthetaedgecloud.com",                    // <----------
      "CreatedAt":"2026-03-10T18:09:29.401909676Z",
      "UpdatedAt":"2026-03-10T18:09:29.516678982Z",
      "DeletedAt":null,
      "UserID":"prjv4bqyvvycsffhq17rxt0kued3dv7",
      "ProjectID":"prj_v4bqyvvycsffhq17rxt0kued3dv7",
      "Shard":1,                             // <----------
      "Name":"jupyternotebng4rkqgf",
      "TemplateName":"Jupyter Notebook",
      "MachineType":"vm_c1",
      "Suffix":"2253d0c24a285991",           // <----------
      "Framework":"raw",
      "ImageURL":"thetalabsofficial/jupyter-pytorch-cuda-full",
      "ContainerPort":8888,
      "ContainerArgsString":"",
      "EnvVarsString":"{\"JUPYTER_PASSWORD\":\"argon2:$argon2i$v=19$m=10240,t=10,p=8$d8PS3QnYlccaNyk7c3aSCw$jK0Offp5tF2ZcZfj1qCGmUFSftl2hT5QHqqqOL2u7Z4\"}",
      "EnvVars":{
         "JUPYTER_PASSWORD":"argon2:$argon2i$v=19$m=10240,t=10,p=8$d8PS3QnYlccaNyk7c3aSCw$jK0Offp5tF2ZcZfj1qCGmUFSftl2hT5QHqqqOL2u7Z4"
      },
      "ContainerArgs":null,
      "CPURequest":"2000m",
      "CPULimit":"2000m",
      "MemRequest":"2048M",
      "MemLimit":"2048M",
      "StorageRequest":"32G",
      "StorageLimit":"32G",
      "GPURequest":"0",
      "GPULimit":"0",
      "GPUModel":"",
      "Replicas":1,
      "PodPhase":"",
      "Annotations":{
         "nickname":"my-notebook",
         "tags":"[\"Text2image\"]"
      },
      "AdditionalPorts":null,
      "PortMappings":null,
      "AdditionalLabels":{
         "org":"org_xx1fpgm0c1ue2i5k5rdk44qc4ej8"
      },
      "AuthUsername":"johnsmith",
      "AuthPassword":"securepw",
      "VolumesString":"",
      "Volumes":null,
      "SelectedRegion":"",
      "PriceHr":"",
      "Cluster":"",
      "NodeIndex":0,
      "BaseID":"dpl_ivxzc7hfsy4mmmpfc3c58xmhjhz6",
      "EndpointStatus":404,
      "NodePublicIP":"34.122.52.225",
      "Region":"us-central-1",
      "GPUMemory":""
   }
}
List Deployments
Use the following command to list deployments in your project:
curl -H 'x-api-key: {EdgeCloud API key}' https://controller.thetaedgecloud.com/deployments/list?project_id={EdgeCloud project id}await thetaEdgeCloud.deployment.list({EdgeCloud project id});Use your own API key and project id in the query parameter, for example:
curl -H 'x-api-key: abc2iiz9t1mkdpv27zr2jf8mp01egxyz' https://controller.thetaedgecloud.com/deployments/list?project_id=prj_v4bqyvvycsffhq17rxt0kued3dv7await thetaEdgeCloud.deployment.list('prj_v4bqyvvycsffhq17rxt0kued3dv7');The response would look like:
{
   "status":"success",
   "body":[
      {
         "ID":466,
         "BaseID":"dpl_3vr4jyx8gd02gpa78wayva4d9meu",     // <----------
         "CreatedAt":"2024-07-01T23:46:44.522286Z",
         "UpdatedAt":"2024-07-01T23:55:17.778443Z",
         "DeletedAt":null,
         "UserID":"5kyver75cswdi2s2u4eby1d7dxyz",
         "ProjectID":"prj_v4bqyvvycsffhq17rxt0kued3dv7",     // <----------
         "Shard":10,             // <----------
         "Name":"notebook1",
         "TemplateName":"Jupyter Notebook",
         "MachineType":"vm_gt1",
         "Suffix":"e4cfd4fb1232c86c",      // <----------
         "Framework":"raw",
         "ImageURL":"jupyter/base-notebook:latest",
         "ContainerPort":8888,
         "ContainerArgsString":"[\"start-notebook.sh\",\"--NotebookApp.token=''\",\"--NotebookApp.password='argon2:$argon2i$v=19$m=10240,t=10,p=8$0nnLoZ7MCYAR2sltZ8xp1g$TounfVQ9NK2/qa3KkWKzuANtWCGkd70+wYXBr73jsuc'\"]",
         "EnvVarsString":"",
         "EnvVars":null,
         "ContainerArgs":[
            "start-notebook.sh",
            "--NotebookApp.token=''",
            "--NotebookApp.password='argon2:$argon2i$v=19$m=10240,t=10,p=8$0nnLoZ7MCYAR2sltZ8xp1g$TounfVQ9NK2/qa3KkWKzuANtWCGkd70+wYXBr73jsuc'"
         ],
         "CPURequest":"2000m",
         "CPULimit":"2000m",
         "MemRequest":"8192M",
         "MemLimit":"8192M",
         "StorageRequest":"128G",
         "StorageLimit":"128G",
         "GPURequest":"1",
         "GPULimit":"1",
         "GPUModel":"nvidia_T4",
         "Replicas":1,
         "PodPhase":"notebook1-deployment-e4cfd4fb1232c86d-7656cf957d-295vk: Running",
         "Annotations":null,
         "AdditionalPorts":null,
         "PortMappings":null,
         "AdditionalLabels":{
            "org":"org_5b0sj4id6m7kdsz3qgs4q2nh1vz4"
         },
         "Endpoint":"https://notebook1-e4cfd4fb1232c86d.tec-beta-s10.onthetaedgecloud.com",
         "EndpointStatus":502,
         "NodePublicIP":"16.171.194.195"
      }
   ]
}
Stop a GPU Node
Among all the deployment types, only GPU Nodes can be stopped and restarted later. To stop a running GPU Node, you need to get its Shard and Suffix properties, as well as the ProjectID, from the deployment and specify them in the following url path.
curl -X PUT -H 'x-api-key: {EdgeCloud API key}' https://controller.thetaedgecloud.com/deployments/{shard}/{suffix}/stop?project_id={EdgeCloud project id}await thetaEdgeCloud.deployment.stop({shard}, {suffix}, {EdgeCloud project id});For example, if we want to stop the deployment returned from the above List API, as you can see, its Shard is 10, Suffix is e4cfd4fb1232c86c, and ProjectID is prj_v4bqyvvycsffhq17rxt0kued3dv7. So the command would look like:
curl -X PUT -H 'x-api-key: abc2iiz9t1mkdpv27zr2jf8mp01egxyz' https://controller.thetaedgecloud.com/deployments/10/e4cfd4fb1232c86c/stop?project_id=prj_v4bqyvvycsffhq17rxt0kued3dv7await thetaEdgeCloud.deployment.stop(10, 'e4cfd4fb1232c86c', 'prj_v4bqyvvycsffhq17rxt0kued3dv7');The response would look like:
{
   "status":"success",
   "body":{
      "ID":"dpl_y4t670djbqfxe495jwq62fwgb7cg",     // <----------
      "Name":"gpunodeabmwv83ujm",
      "OrgID":"org_xx1fpgm0c1ue2i5k5rdk44qc4ej8",
      "ProjectID":"prj_v4bqyvvycsffhq17rxt0kued3dv7",
      "DeploymentImageID":"img_n67q5y3xu9pcyqqcajz5cd72263n",
      "ImageURL":"thetalabsorg/pytorch_cuda_with_ssh:v0.0.2",
      "MachineType":"vm_c1",
      "Replicas":1,
      "MaxReplicas":1,
      "AdditionalPorts":null,
      "Annotations":{
         "nickname":"my-gpu-node"
      },
      "Volumes":null,
      "AuthUsername":"",
      "AuthPassword":"",
      "registryUsername":null,
      "DeploymentID":null,
      "ContainerPort":8888,
      "CreatedAt":"2026-03-10T18:28:12.165Z",
      "SelectedRegion":null,
      "PriceHr":null,
      "Events":null
   }
}
Start a (stopped) GPU Node
To restart a stopped GPU Node, you need to get its ID and specify it in the following url path.
curl -X PUT -H 'x-api-key: {EdgeCloud API key}' https://controller.thetaedgecloud.com/deployments/base/{ID}/start?project_id={EdgeCloud project id}For example, if we want to restart the GPU Node returned from the above stop API, as you can see, its ID is dpl_y4t670djbqfxe495jwq62fwgb7cg, and ProjectID is prj_v4bqyvvycsffhq17rxt0kued3dv7. So the command would look like:
curl -X PUT -H 'x-api-key: {EdgeCloud API key}' https://controller.thetaedgecloud.com/deployments/base/dpl_y4t670djbqfxe495jwq62fwgb7cg/start?project_id=prj_v4bqyvvycsffhq17rxt0kued3dv7Note if you don't get the ID from the Stop GPU Node API response, you can still get it from the List Deployments API, only the name is called BaseID there.
Delete a Deployment
To delete an existing deployment, you need to get its Shard and Suffix properties, as well as the ProjectID, from the deployment and specify them in the following url path.
curl -X DELETE -H 'x-api-key: {EdgeCloud API key}' https://controller.thetaedgecloud.com/deployments/{shard}/{suffix}?project_id={EdgeCloud project id}await thetaEdgeCloud.deployment.remove({shard}, {suffix}, {EdgeCloud project id});For example, if we want to delete the deployment returned from the above List API, as you can see, its Shard is 10, Suffix is e4cfd4fb1232c86c, and ProjectID is prj_v4bqyvvycsffhq17rxt0kued3dv7. So the command would look like:
curl -X DELETE -H 'x-api-key: abc2iiz9t1mkdpv27zr2jf8mp01egxyz' https://controller.thetaedgecloud.com/deployments/10/e4cfd4fb1232c86c?project_id=prj_v4bqyvvycsffhq17rxt0kued3dv7await thetaEdgeCloud.deployment.remove(10, 'e4cfd4fb1232c86c', 'prj_v4bqyvvycsffhq17rxt0kued3dv7');Updated 4 months ago