Distributed AI Models Training with GPU Clusters
In addition to individual GPU nodes, Theta EdgeCloud now lets you create a GPU cluster consisting of multiple GPU Nodes with the same type in the same region. The nodes inside a cluster can communicate directly to each other, which makes distributed AI model training possible on Theta EdgeCloud.
1. Create a GPU cluster
To launch a GPU cluster, First navigate to the "GPU cluster" page under the "Training" category, which can be assessed by simply clicking on the "AI" icon on the left bar, and then click on the "GPU Cluster" tab.
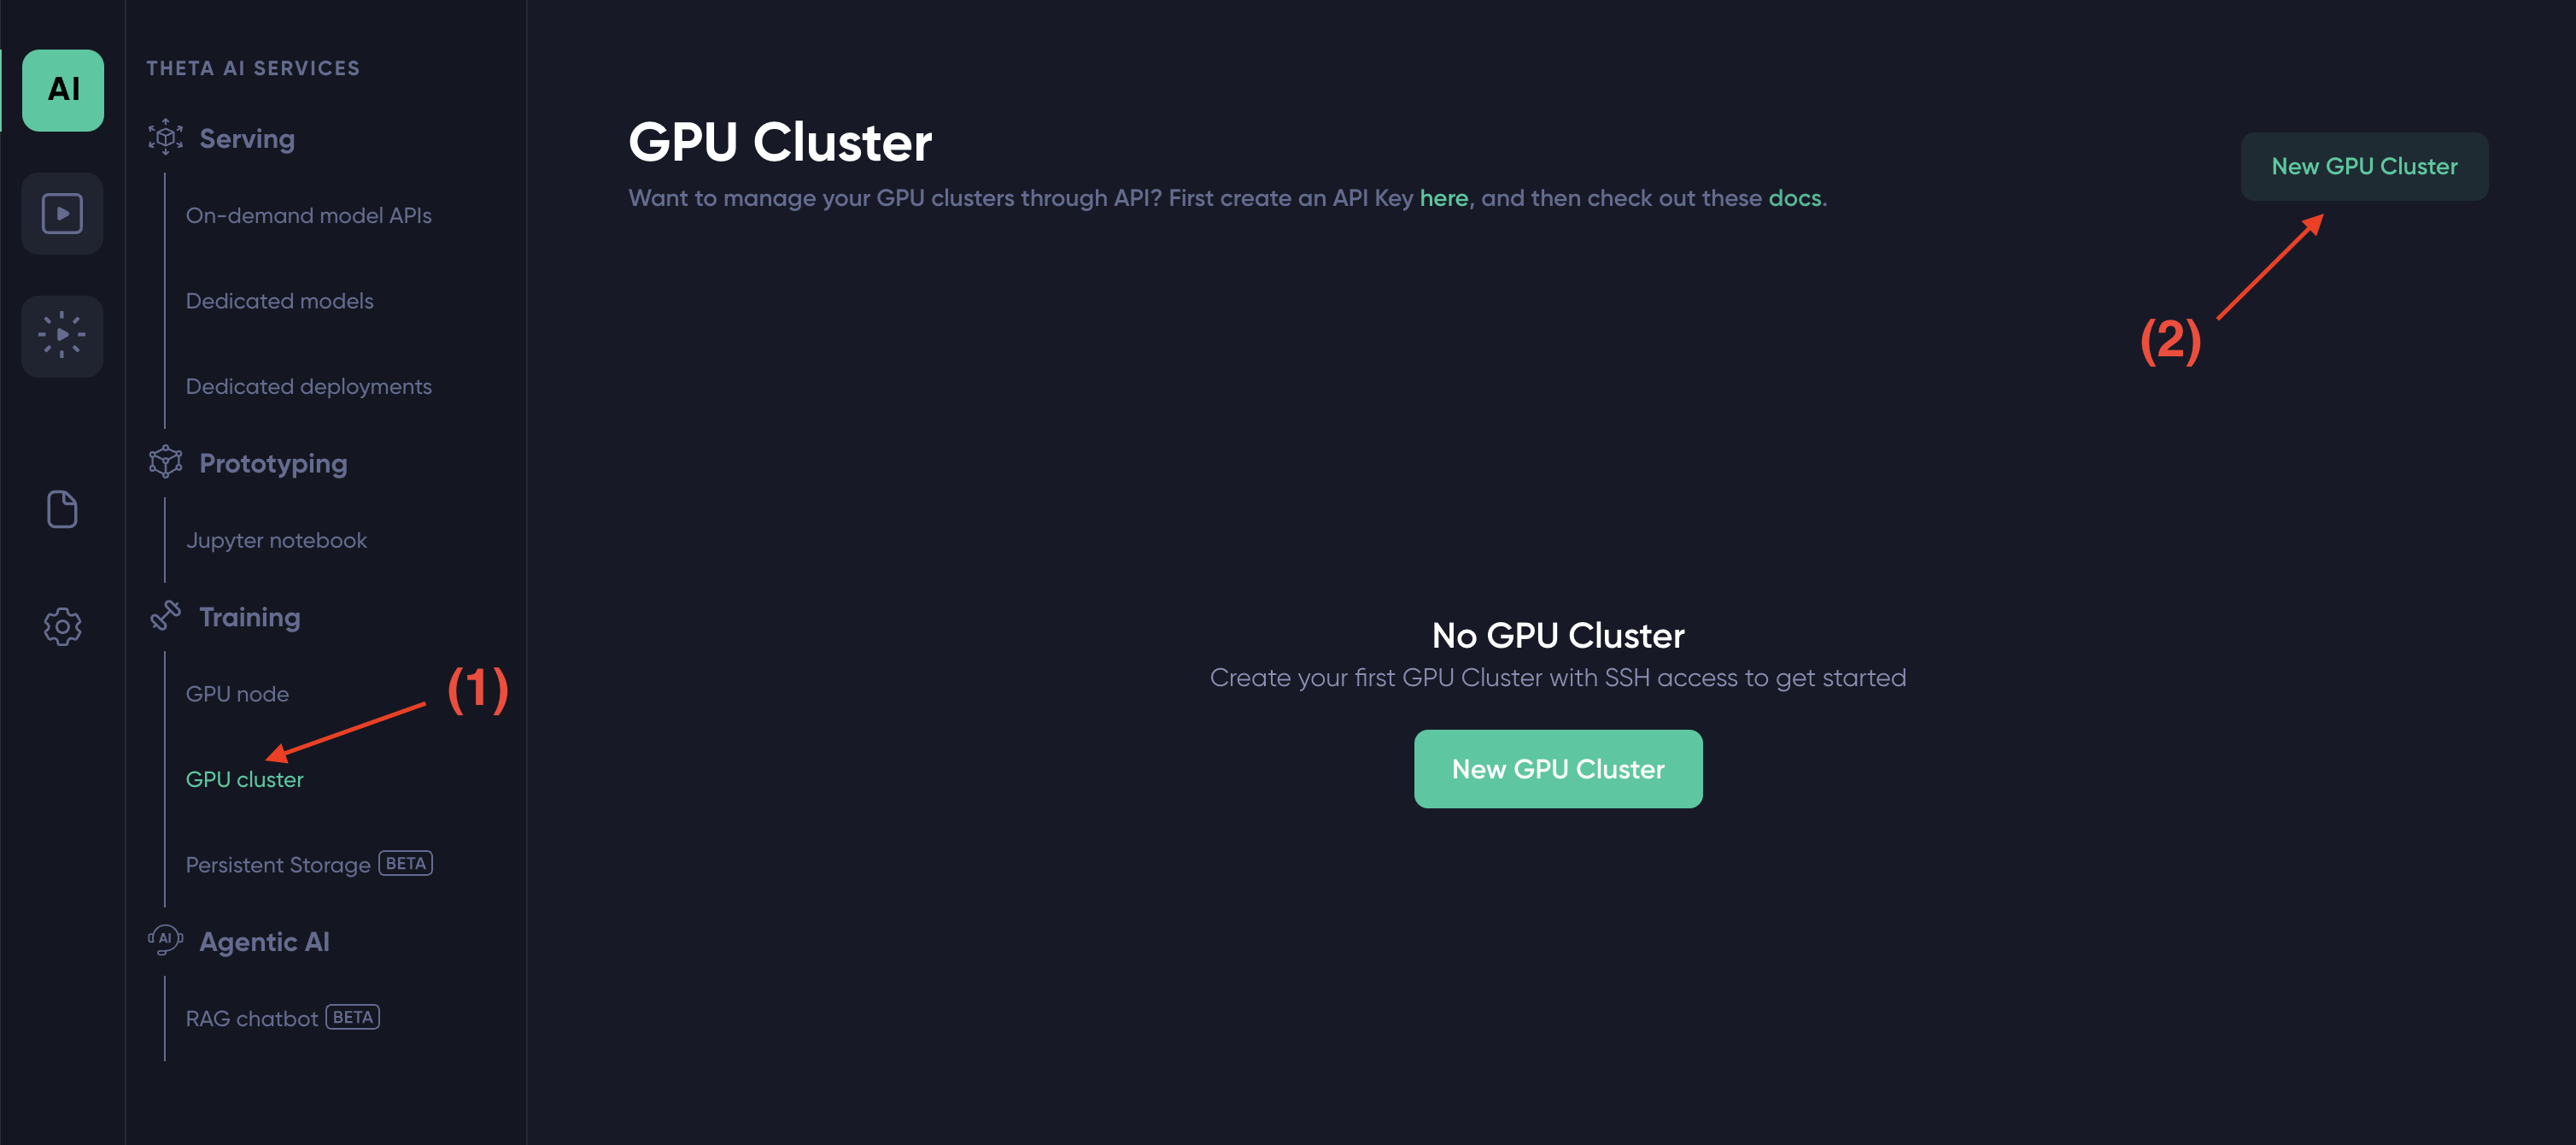
Next, click on "New GPU Cluster". You should see the a modal like below popping up which will guide you through the 3-step process to create a GPU cluster.
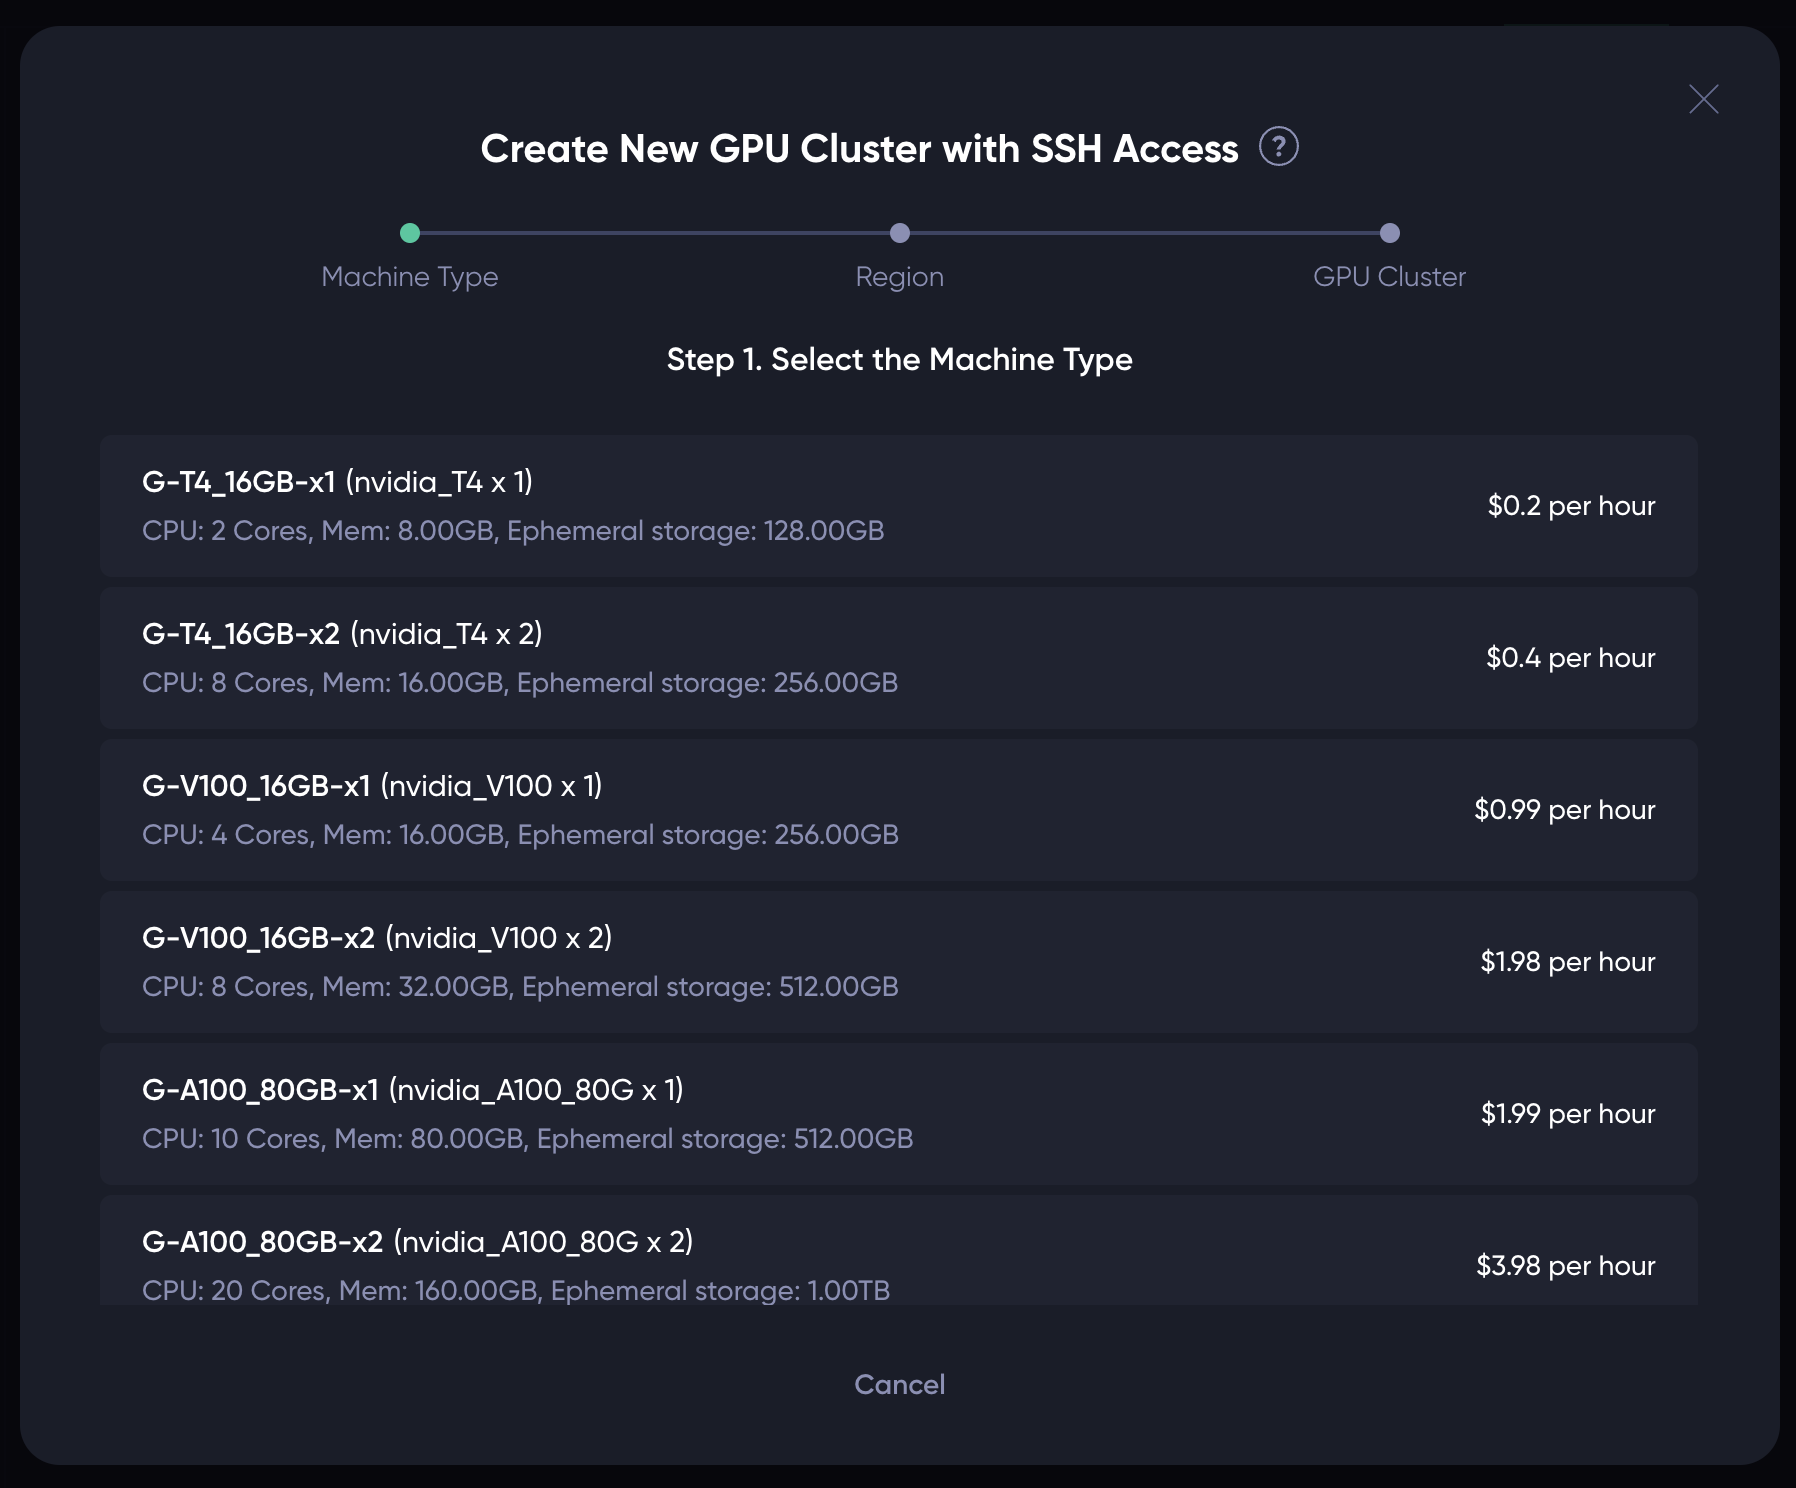
For the first step, simply click on the type of machine you want to create your cluster with. In the example, we create our cluster with the G-H100_80GB-x2 machine type.
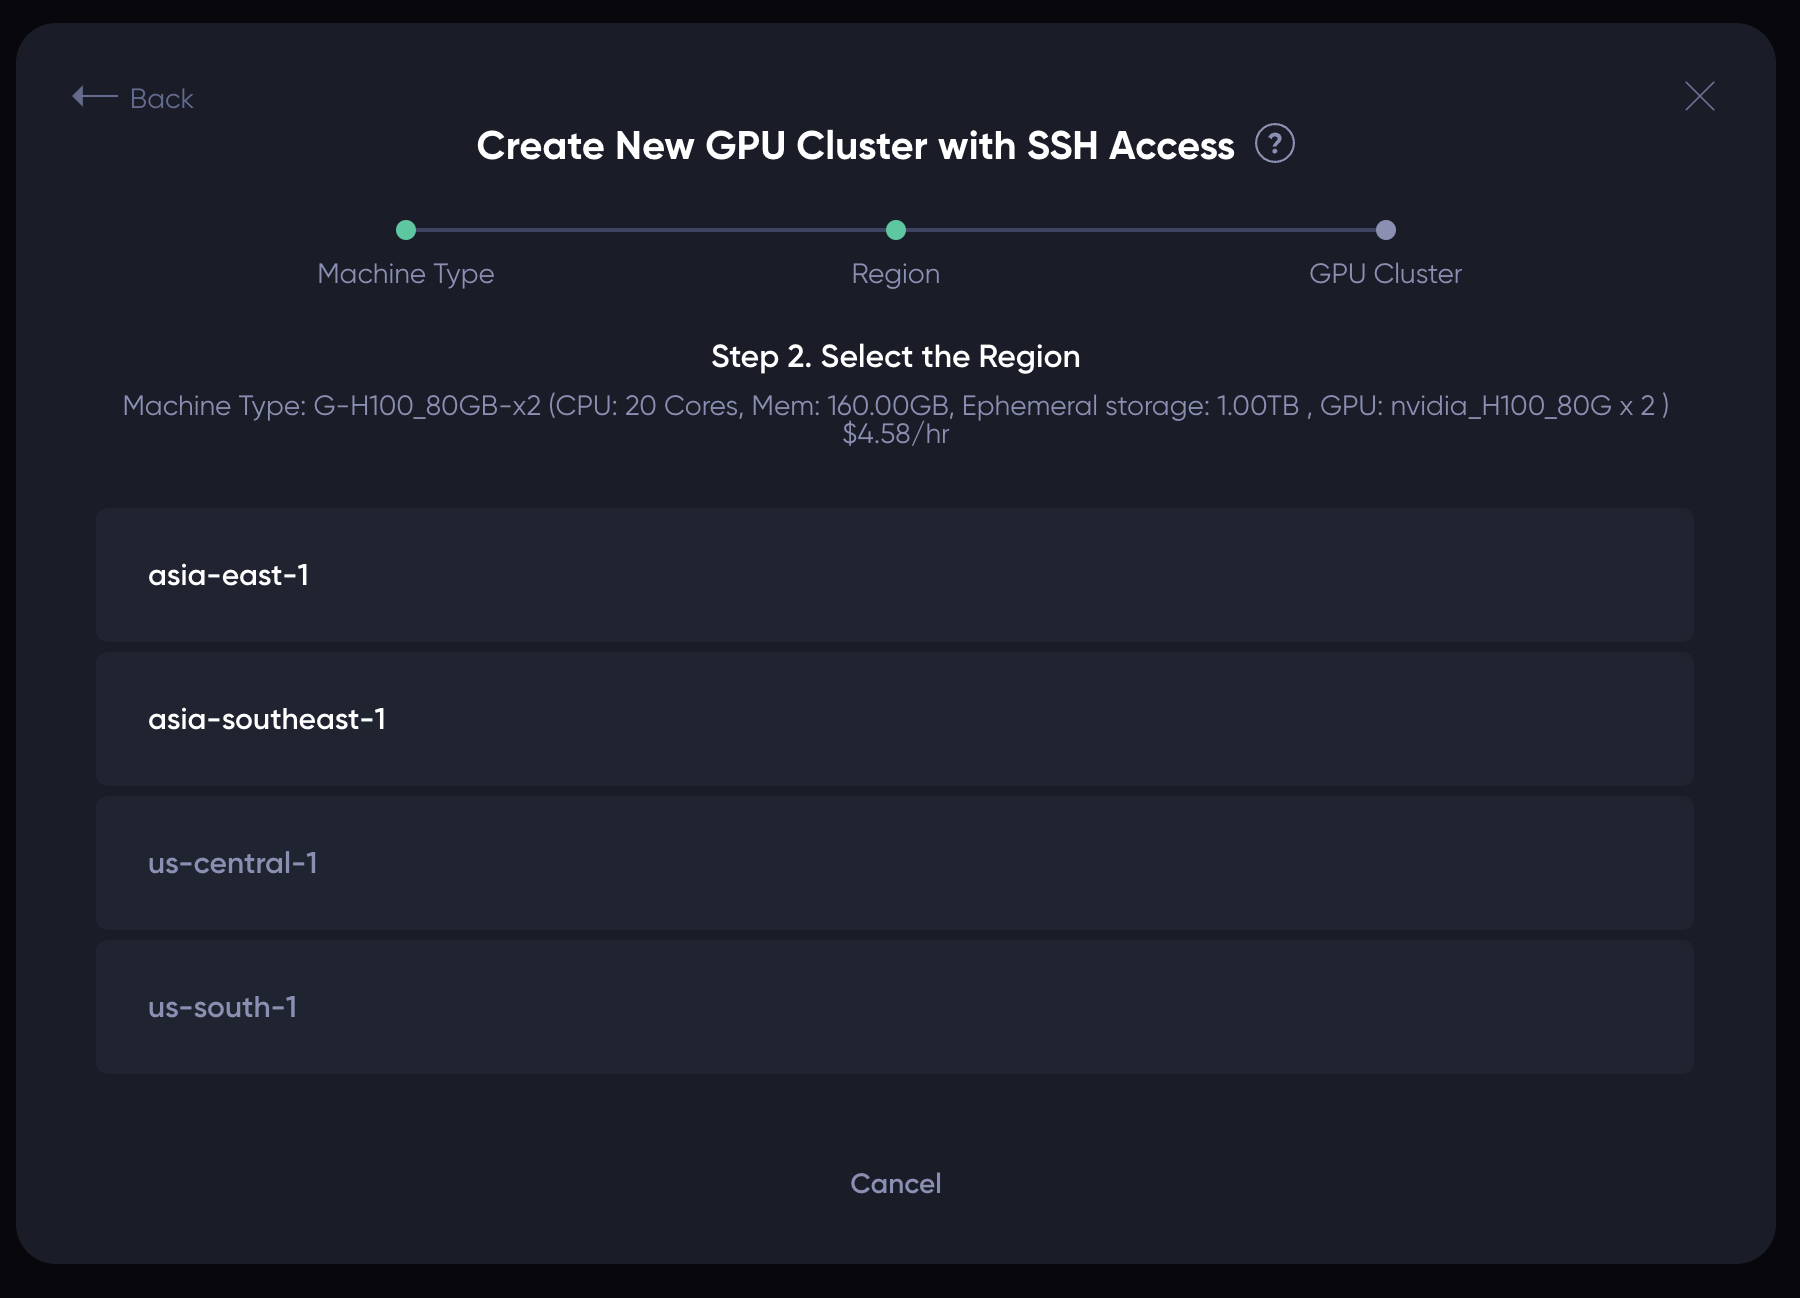
The second step shows the regions where the type of machine chosen are available. For example, the GPU machine type we chose in the first step is available in region asia-east-1 and asia-southeast-1. Click on the region where you want to launch the GPU cluster, and the following UI should show up:
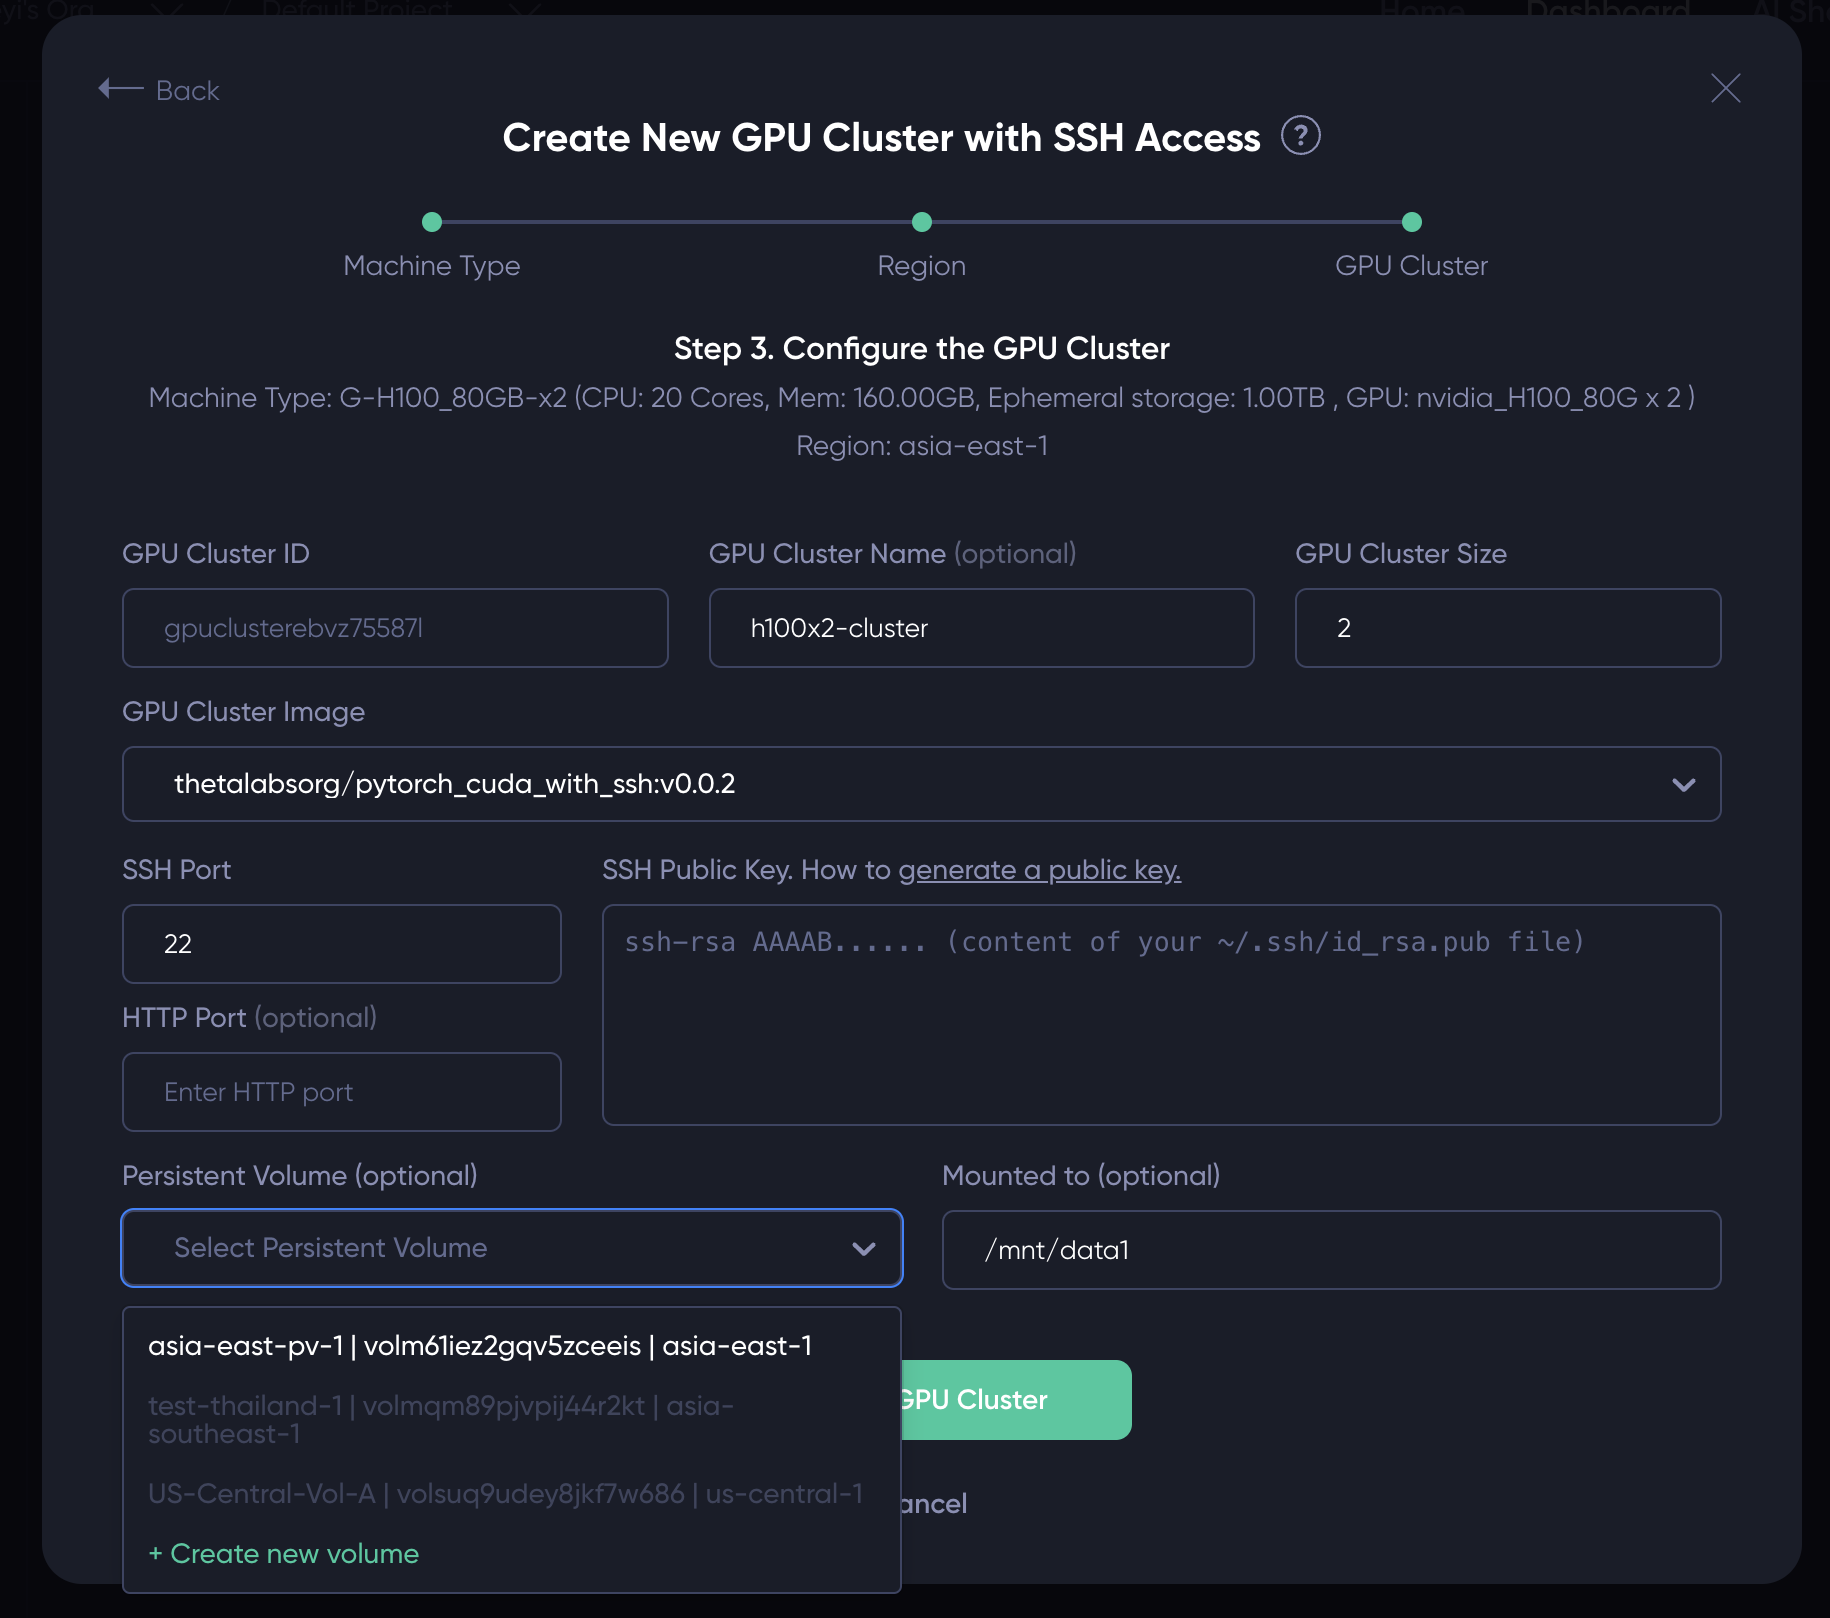
Most fields on the UI are self-explanatory. In particular:
GPU Cluster ID: this is a read-only field generated automatically.GPU Cluster Name(Optional): you can specify a name for the cluster in the "GPU Cluster Name" field. You can also leave it blank update the name later after the node is launched.GPU Cluster Size: you can specify the size of your GPU cluster, i.e. how many GPU nodes the cluster contains at launch. You can add more nodes to the cluster post-launch.GPU Cluster Image(Required): You need to specify the container image for the GPU nodes in the cluster in the "GPU Cluster Image" field. The image needs to be a container withsshdrunning in the background. Otherwise you will not be able to SSH into the nodes. You can either type in the container URL (e.g.thetalabsorg/ubuntu-sshd:latest), or select an image image we prepared from the drop-down list.SSH port(Required): This is the port thesshdprocess in the container listens to. By default it is 22. If yoursshdprocess is using another port, please update this field accordingly.SSH Public Key(Required): Please paste your SSH public key here, which is a long string starting withssh-rsa. The RSA public is typically stored in your~/.ssh/id_isa.pubfile. Please checkout this link on how to generate your SSH public key.HTTP Port(Optional): This field is empty by default. However, if you have an HTTP server running in your container (e.g. Jupyter notebook, TensorBoard server), you can specify the port it listens to. We will map it to an HTTPs endpoint for you to interact with the server (see Note 2 in the "Tips" section).Persistent Volume: This allows you to mount a persistent volume to each of the GPU nodes in the cluster. This allows all the nodes in the cluster access the same persistent volume. Note that only the persistent volumes created in the same region can be mounted. Please choose the available volumes from the dropdown list, or create a new volume on the spot. Please learn more about how to create a persistent volume here.Mounted to: The mount point of the persistent volume. By default it is/mnt/data1but you can change it to any path you like.
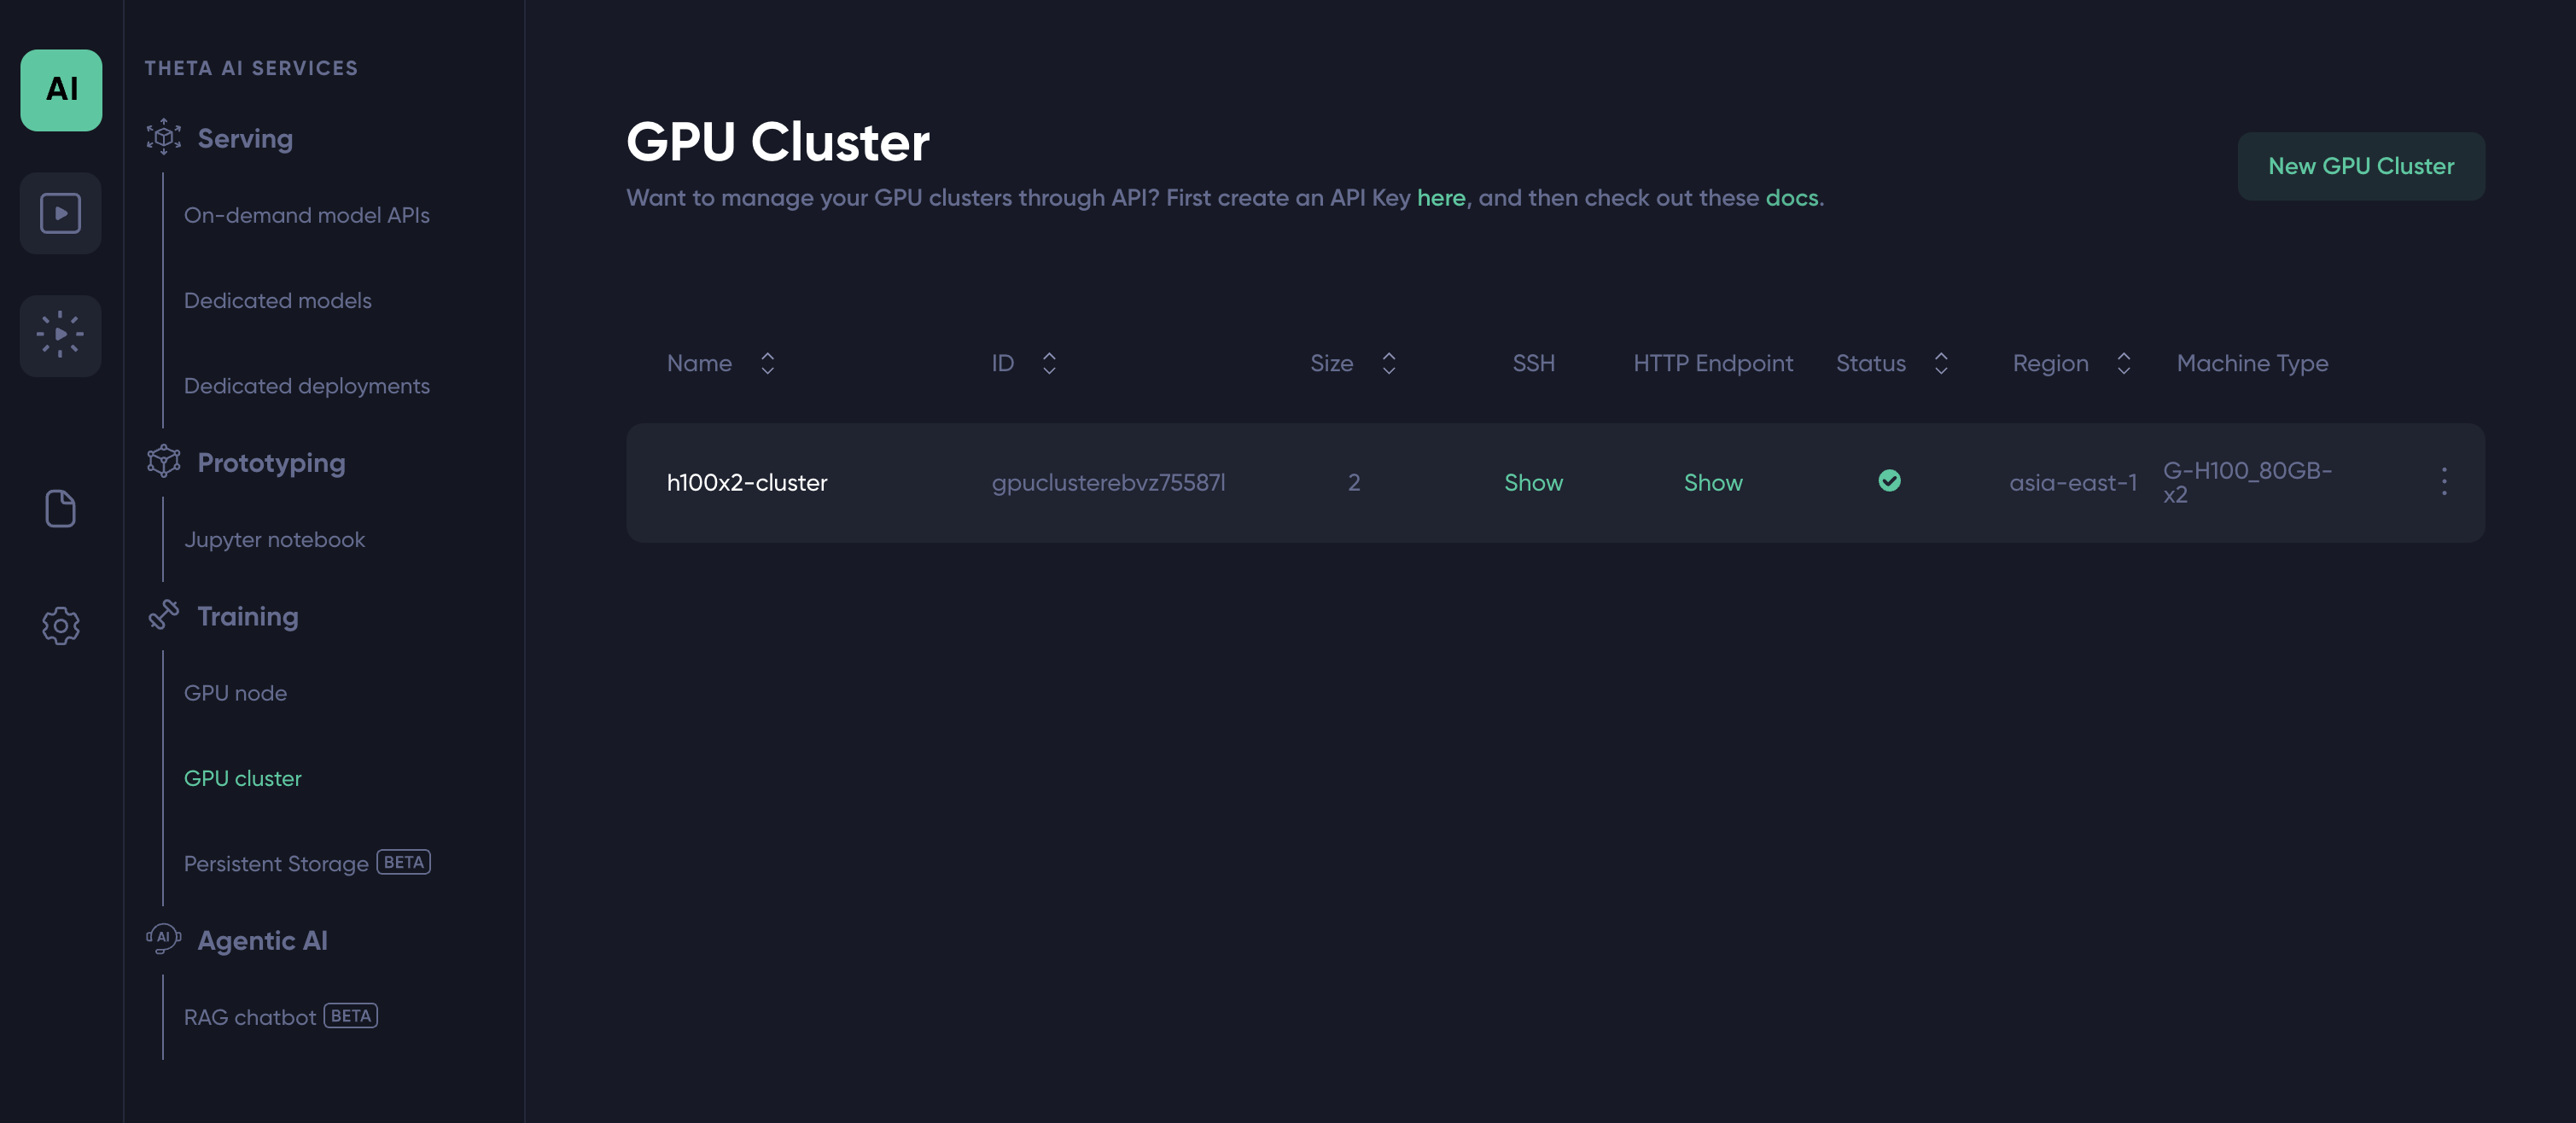
After filling in the above fields, please click on the "Create GPU Cluster" button to launch the GPU cluster, which should also redirect you to a page similar to the following:
2. SSH to the GPU nodes inside the cluster
Depending on the size of the container image, it may take a few minutes to fire up the GPU node. Once it is up and running, you can connect to the node via SSH. Simply click the green "Show" button in the above screenshot to see the SSH commands for each GPU node in the cluster.
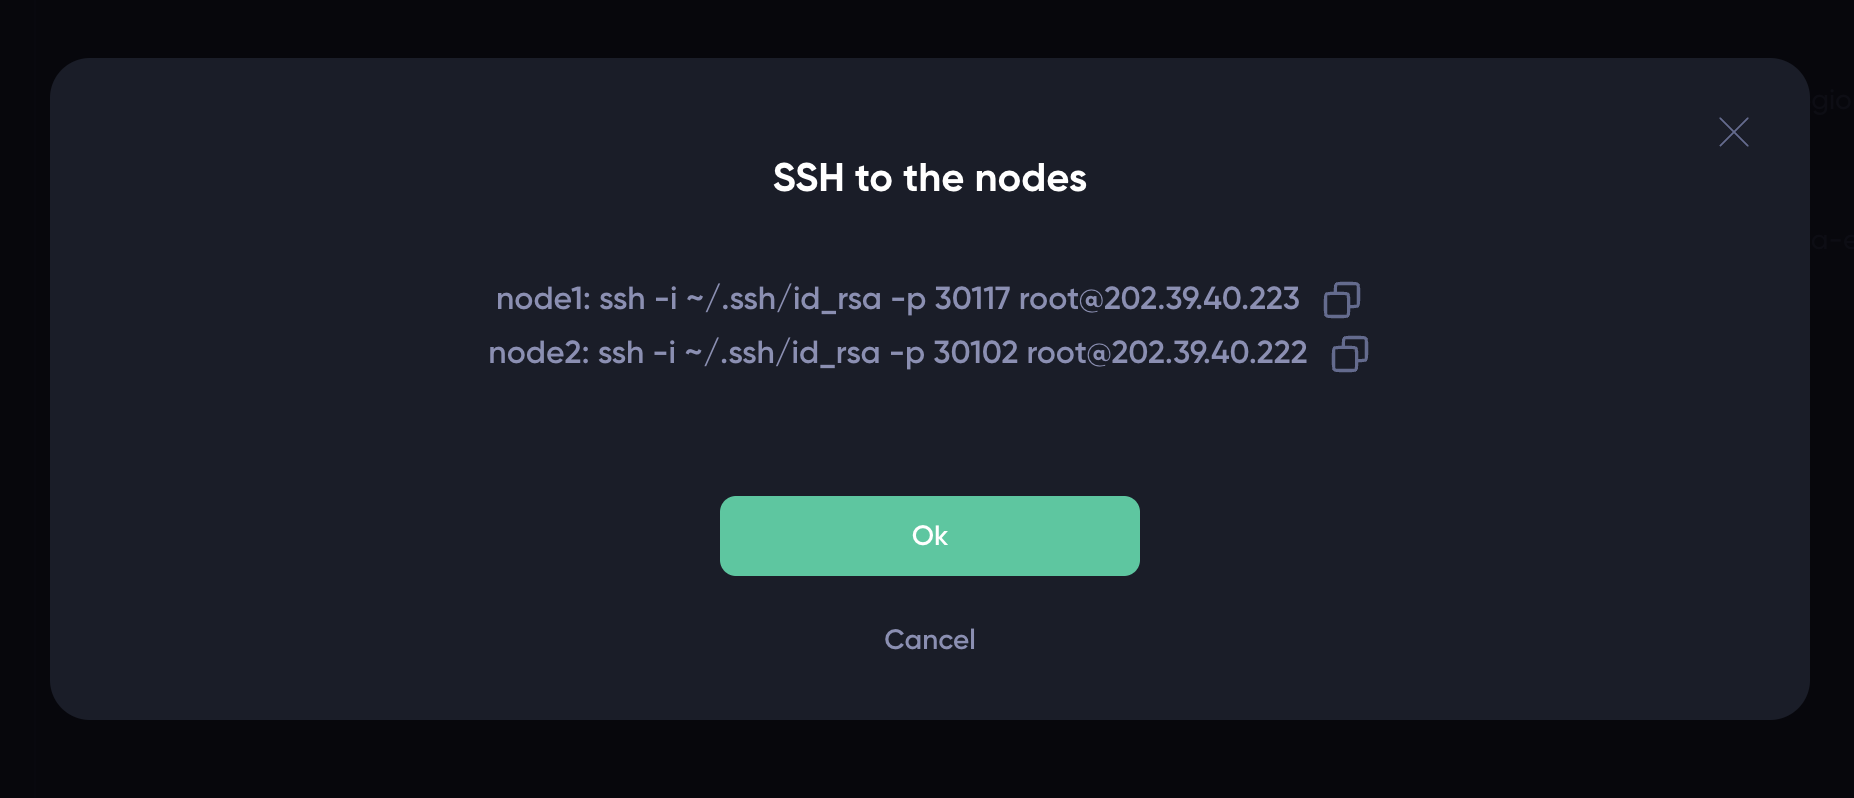
Alternatively, you can click anywhere on the row to see the details on the GPU cluster.

You should see a the GPU Cluster details page similar to the following:
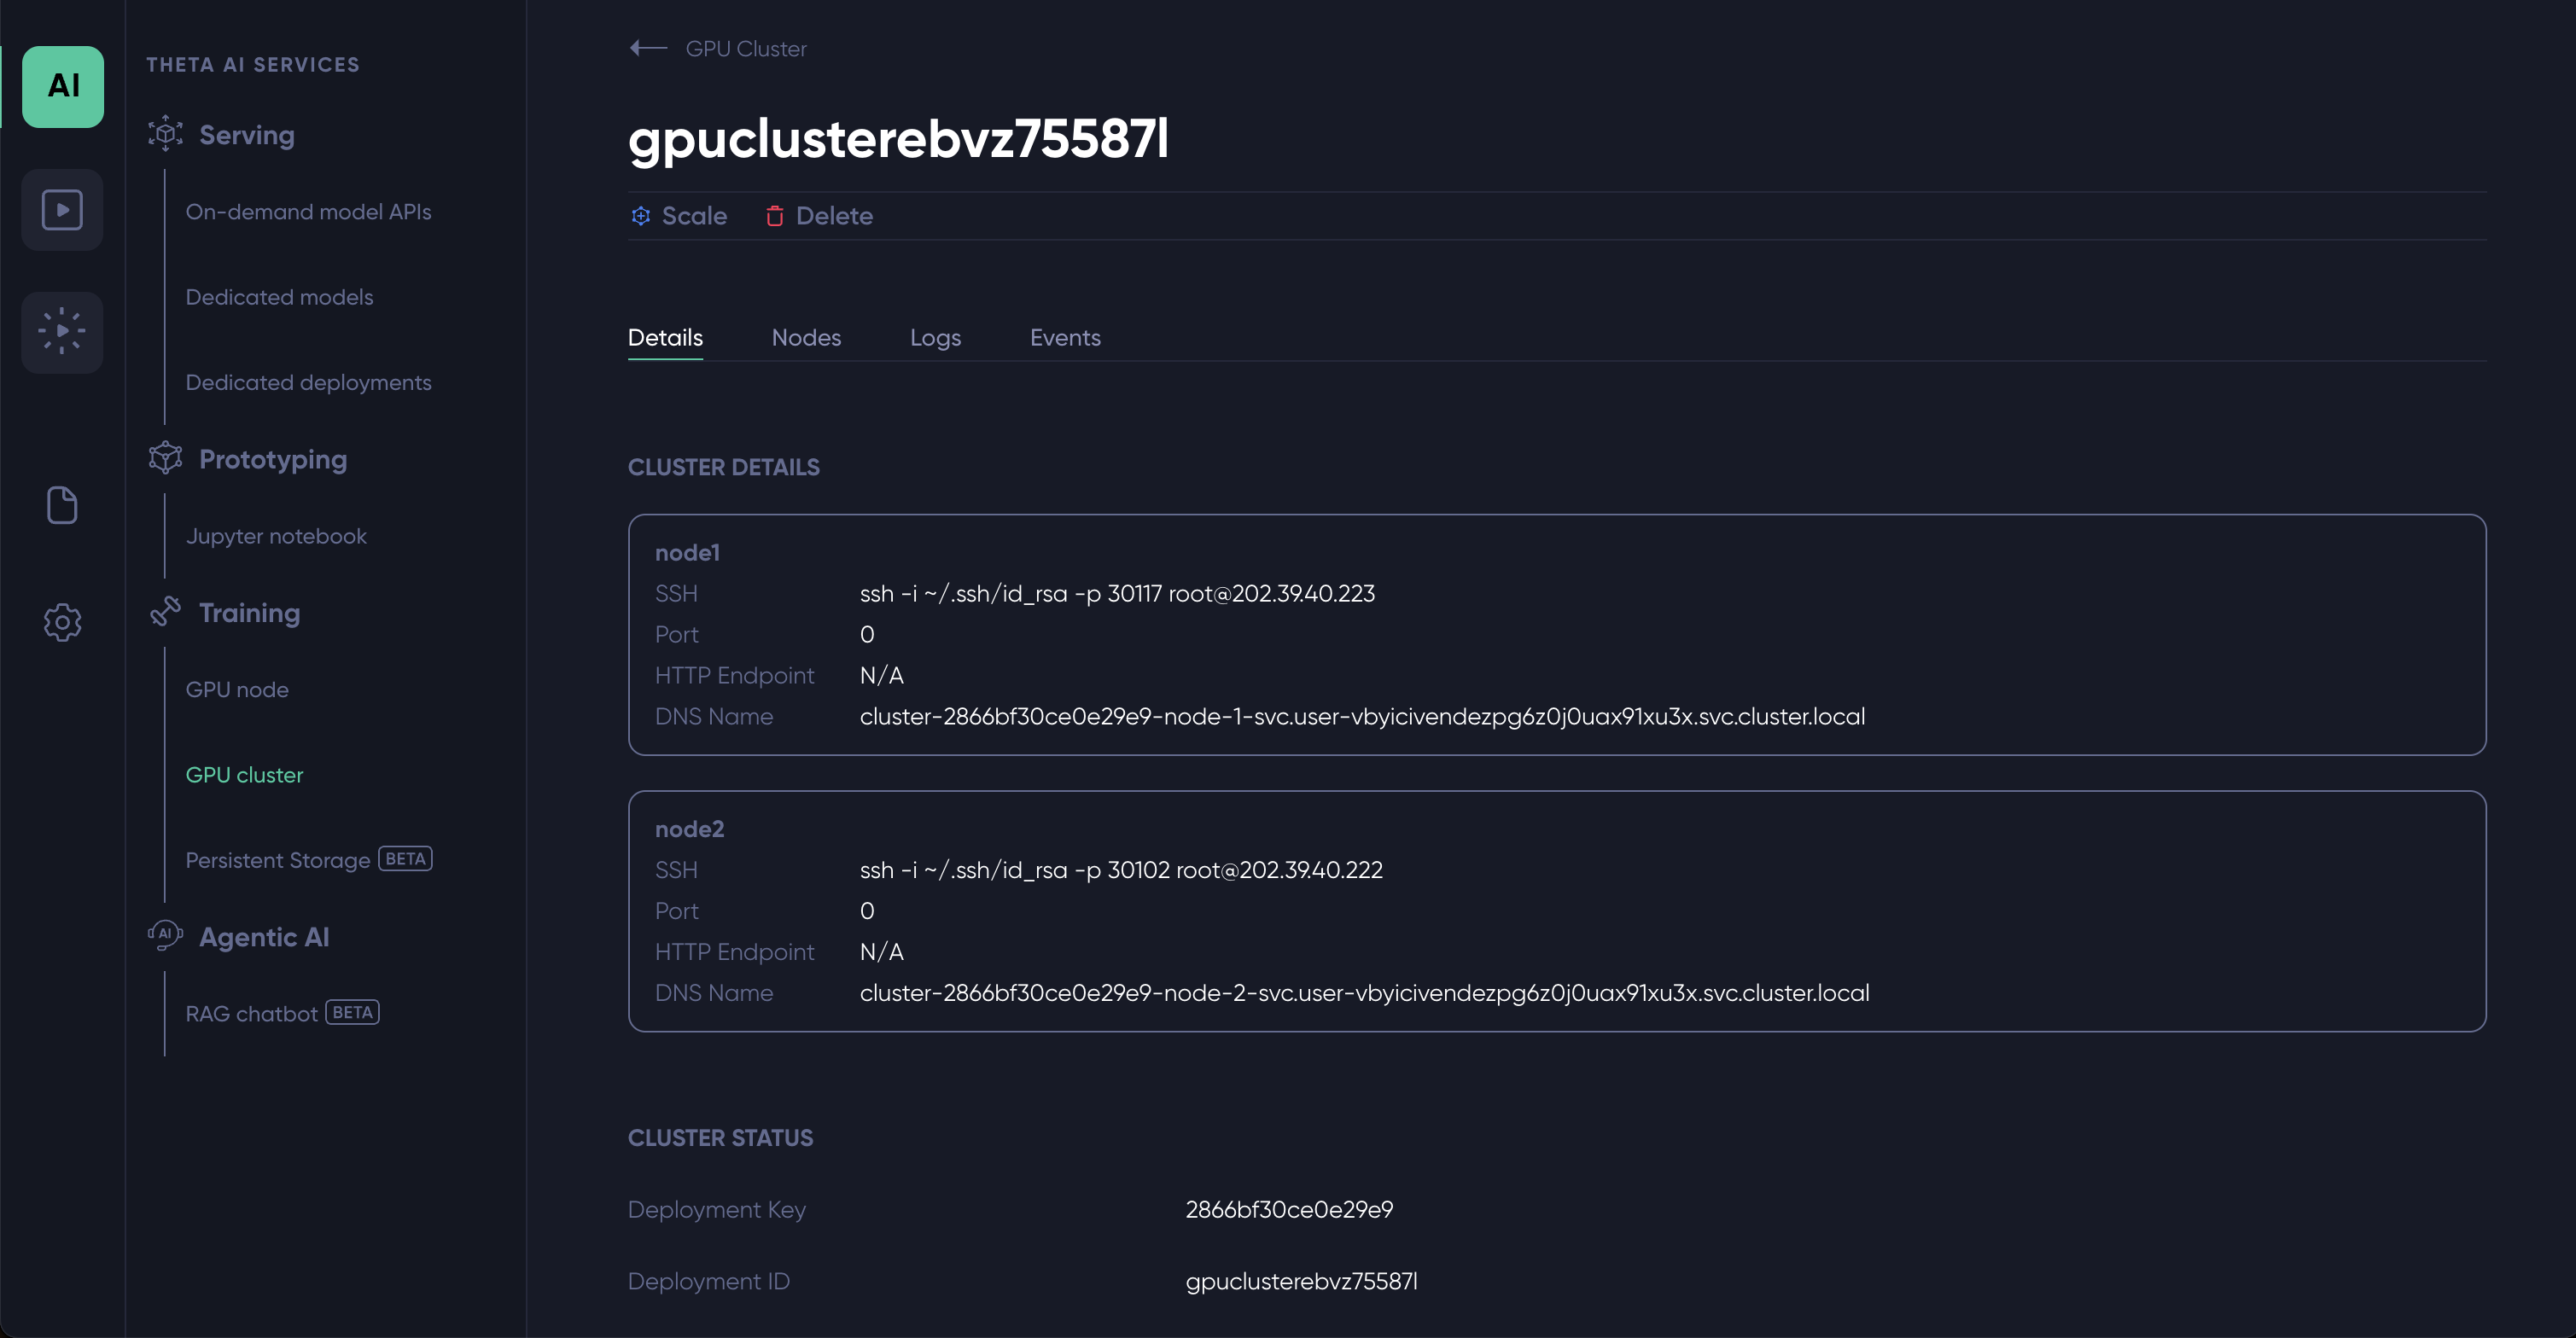
For each of the GPU Node in the cluster, the page lists:
- SSH command to connect to the node
- HTTP Port if you specified it when creating the cluster, N/A otherwise
- The HTTP endpoint if you specified an HTTP port when creating the cluster, N/A otherwise
- DNS Name: the DNS name of the node in the cluster. A node will be able to communicate directly to any other node in the cluster using the target node's DNS name.
3. Direct communication among the GPU nodes in the cluster
By default a GPU node can communicate with any other node in the cluster through ANY port using the DNS name of the target node. In the following, we run a process in Node2 listening to port 5678. Then, in Node1, we can run the nc command to connect to this port using Node2's DNS name listed on the details page:
nc -vz cluster-2866bf30ce0e29e9-node-2-svc.user-vbyicivendezpg6z0j0uax91xu3x.svc.cluster.local 5678 
4. Upscale the GPU cluster
If needed, you can add more GPU nodes (same type same region) to the cluster while the cluster is running. To do this, on the GPU Cluster details page, click on the "Scale" button.
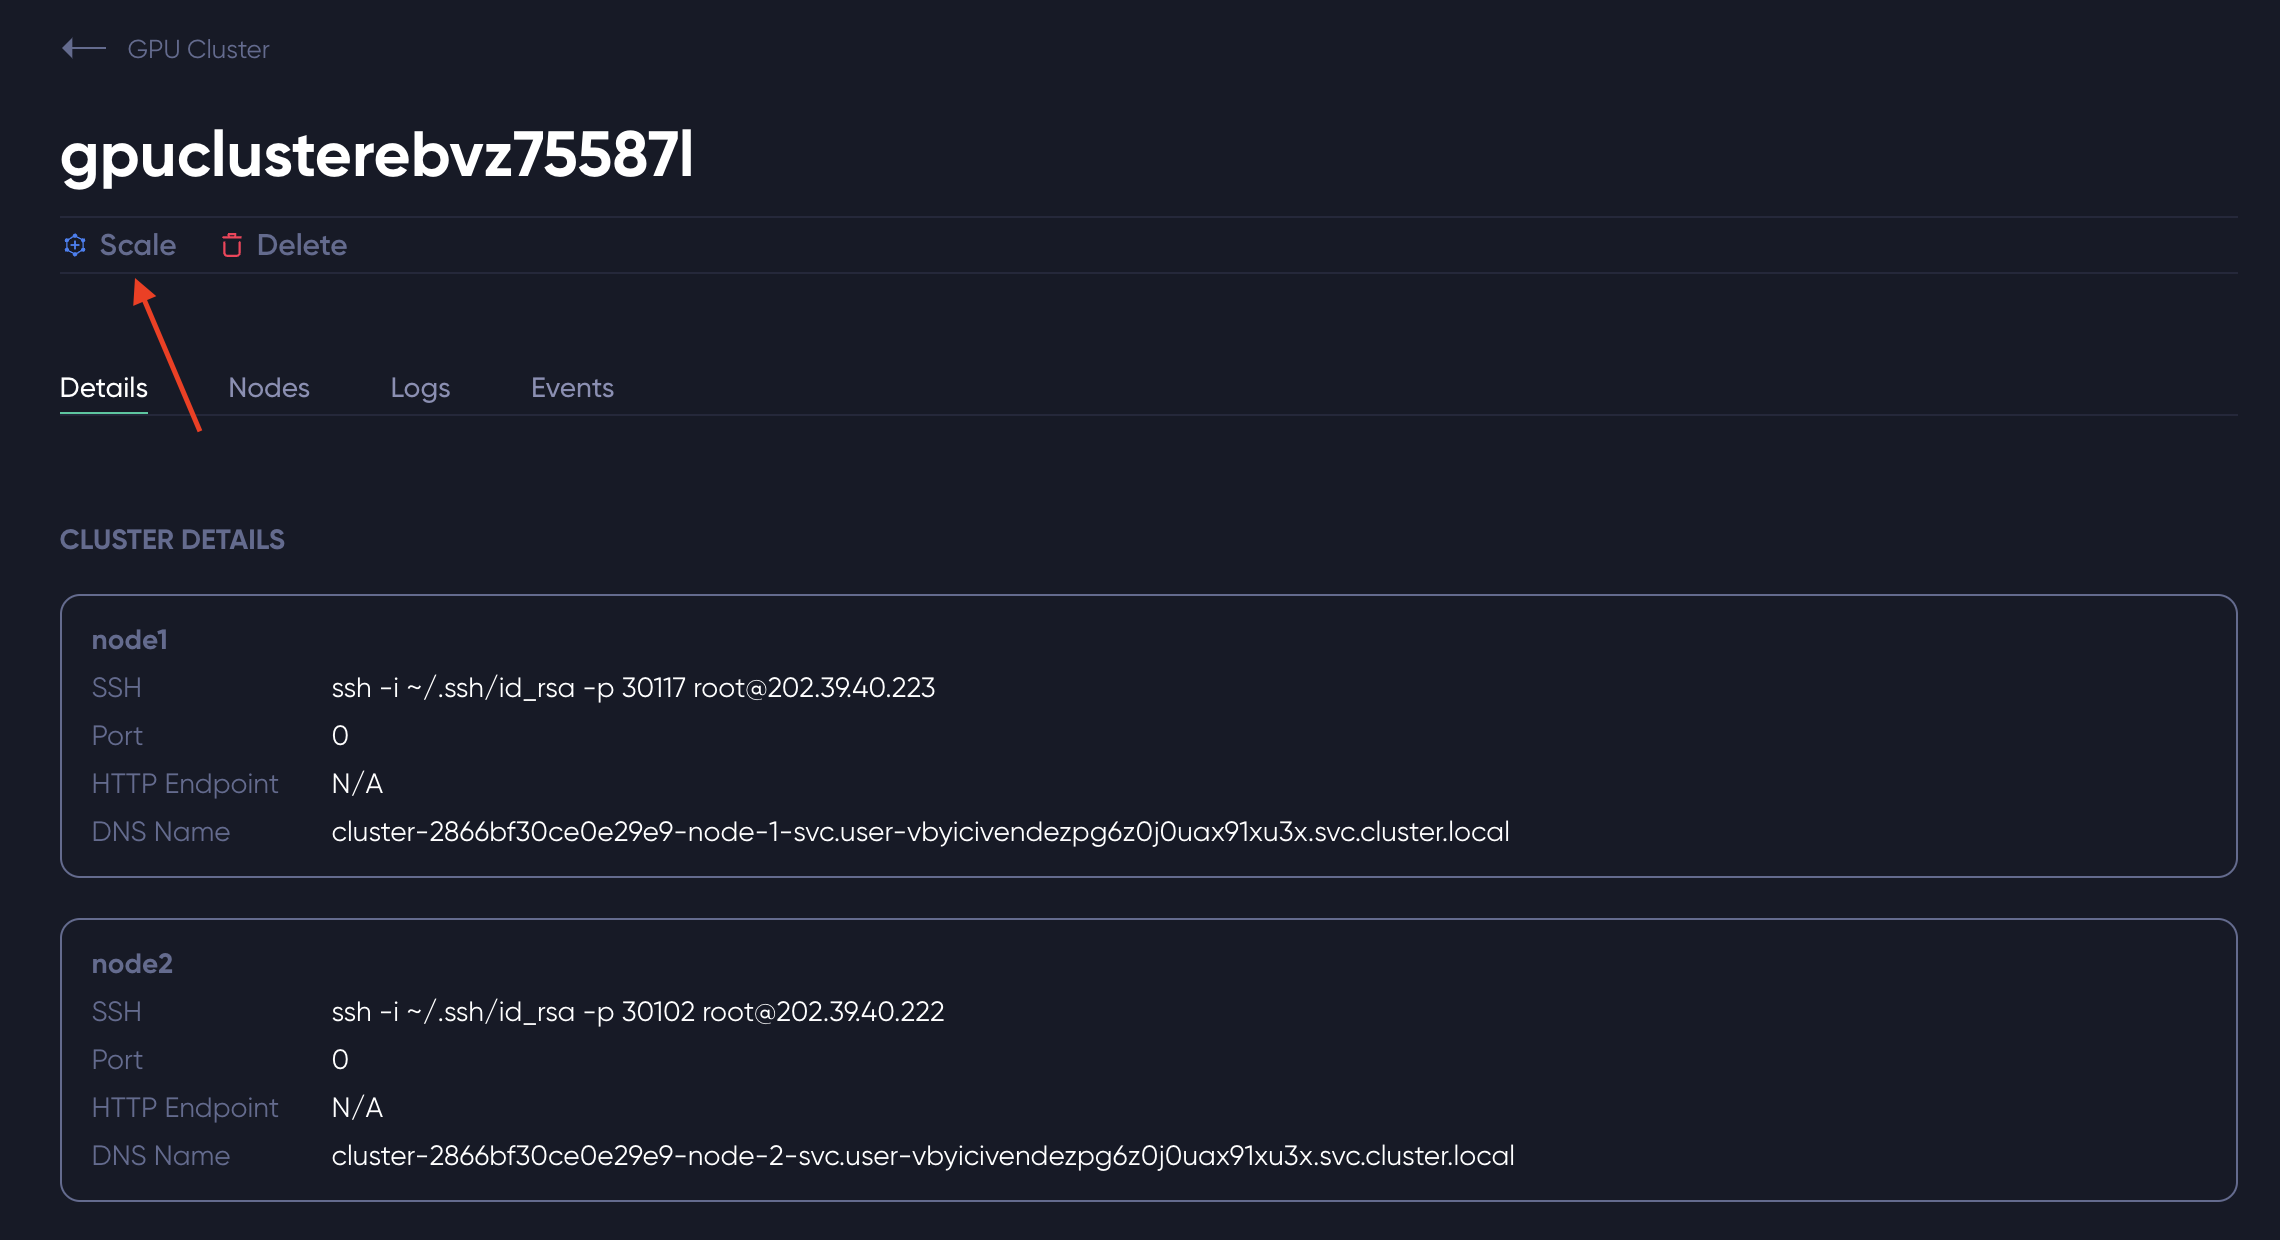
You should see the following pop-up modal:
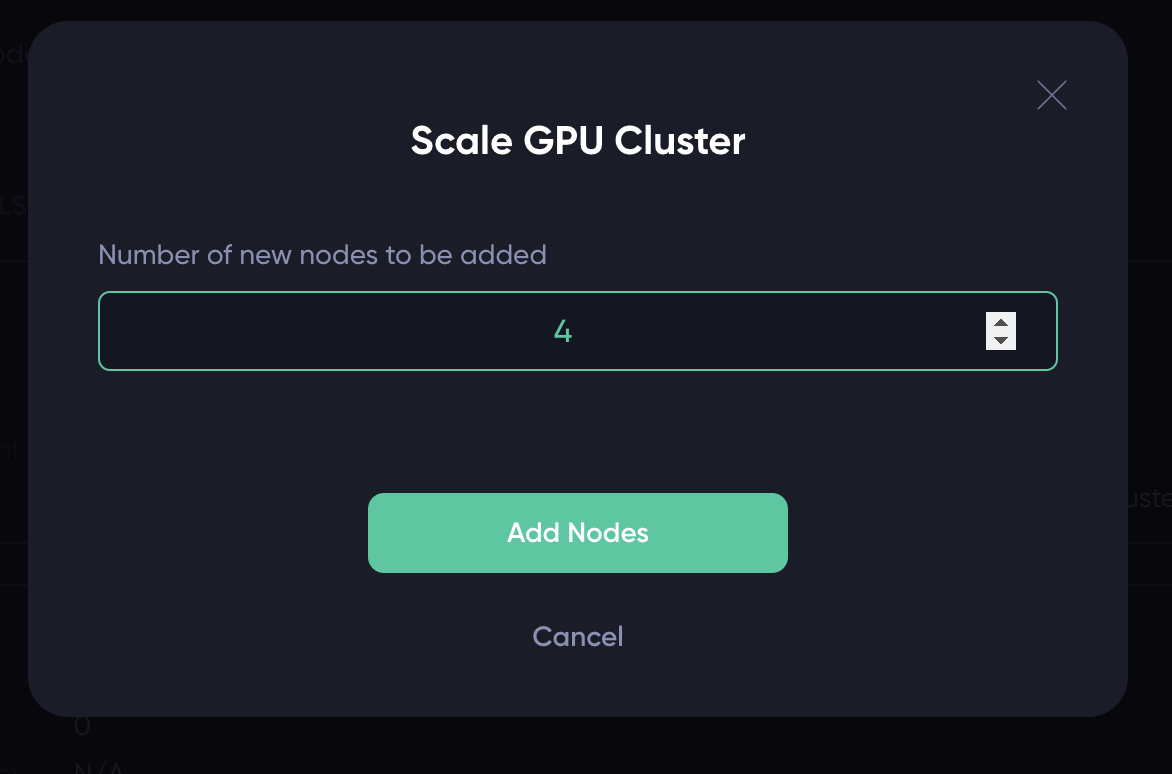
Enter the number of new nodes you want to add to the cluster, and click the "Add Nodes" button. Refresh the details page, you should see new GPU nodes added to the cluster shortly.
Updated 3 months ago