Train AI Models on GPU Nodes with SSH Access
Theta EdgeCloud offers GPU nodes with SSH access for you to run AI model training, and any other computational tasks. The user flow is pretty similar to how you create and use a "virtual machine" on AWS/GCP:
- Support for GPU node stop/restart: Users can stop and restart a GPU node. The system remembers the metadata of a GPU node (e.g. the container URL, port, machine type, etc) when the user stops it.
- Support for GPU node reconfiguration: Users can change certain metadata of a GPU node in the stopped state, such as machine type (e.g. V100x1 → H100x2) without losing the data stored in the persistent storage.
- Persistent Storage: User can configure and attach multiple persistent volumes to a GPU node. Note that to foster team collaboration, we support sharable volumes among GPU nodes, i.e., multiple GPU nodes might access the same persistent volume (e.g. for sharing certain model checkpoints, training data, etc).
- Regions: We provide GPU nodes in many regions across the globe. Users can launch GPU nodes in a region close them to minimize network latency.
Below are the instructions to launch and use a GPU node.
1. Launching a GPU Node in EdgeCloud
1.1 Create a GPU node
First navigate to the "GPU node" page under the "Training" category, which can be assessed by simply clicking on the "AI" icon on the left bar, and then click on the "GPU Node" tab.
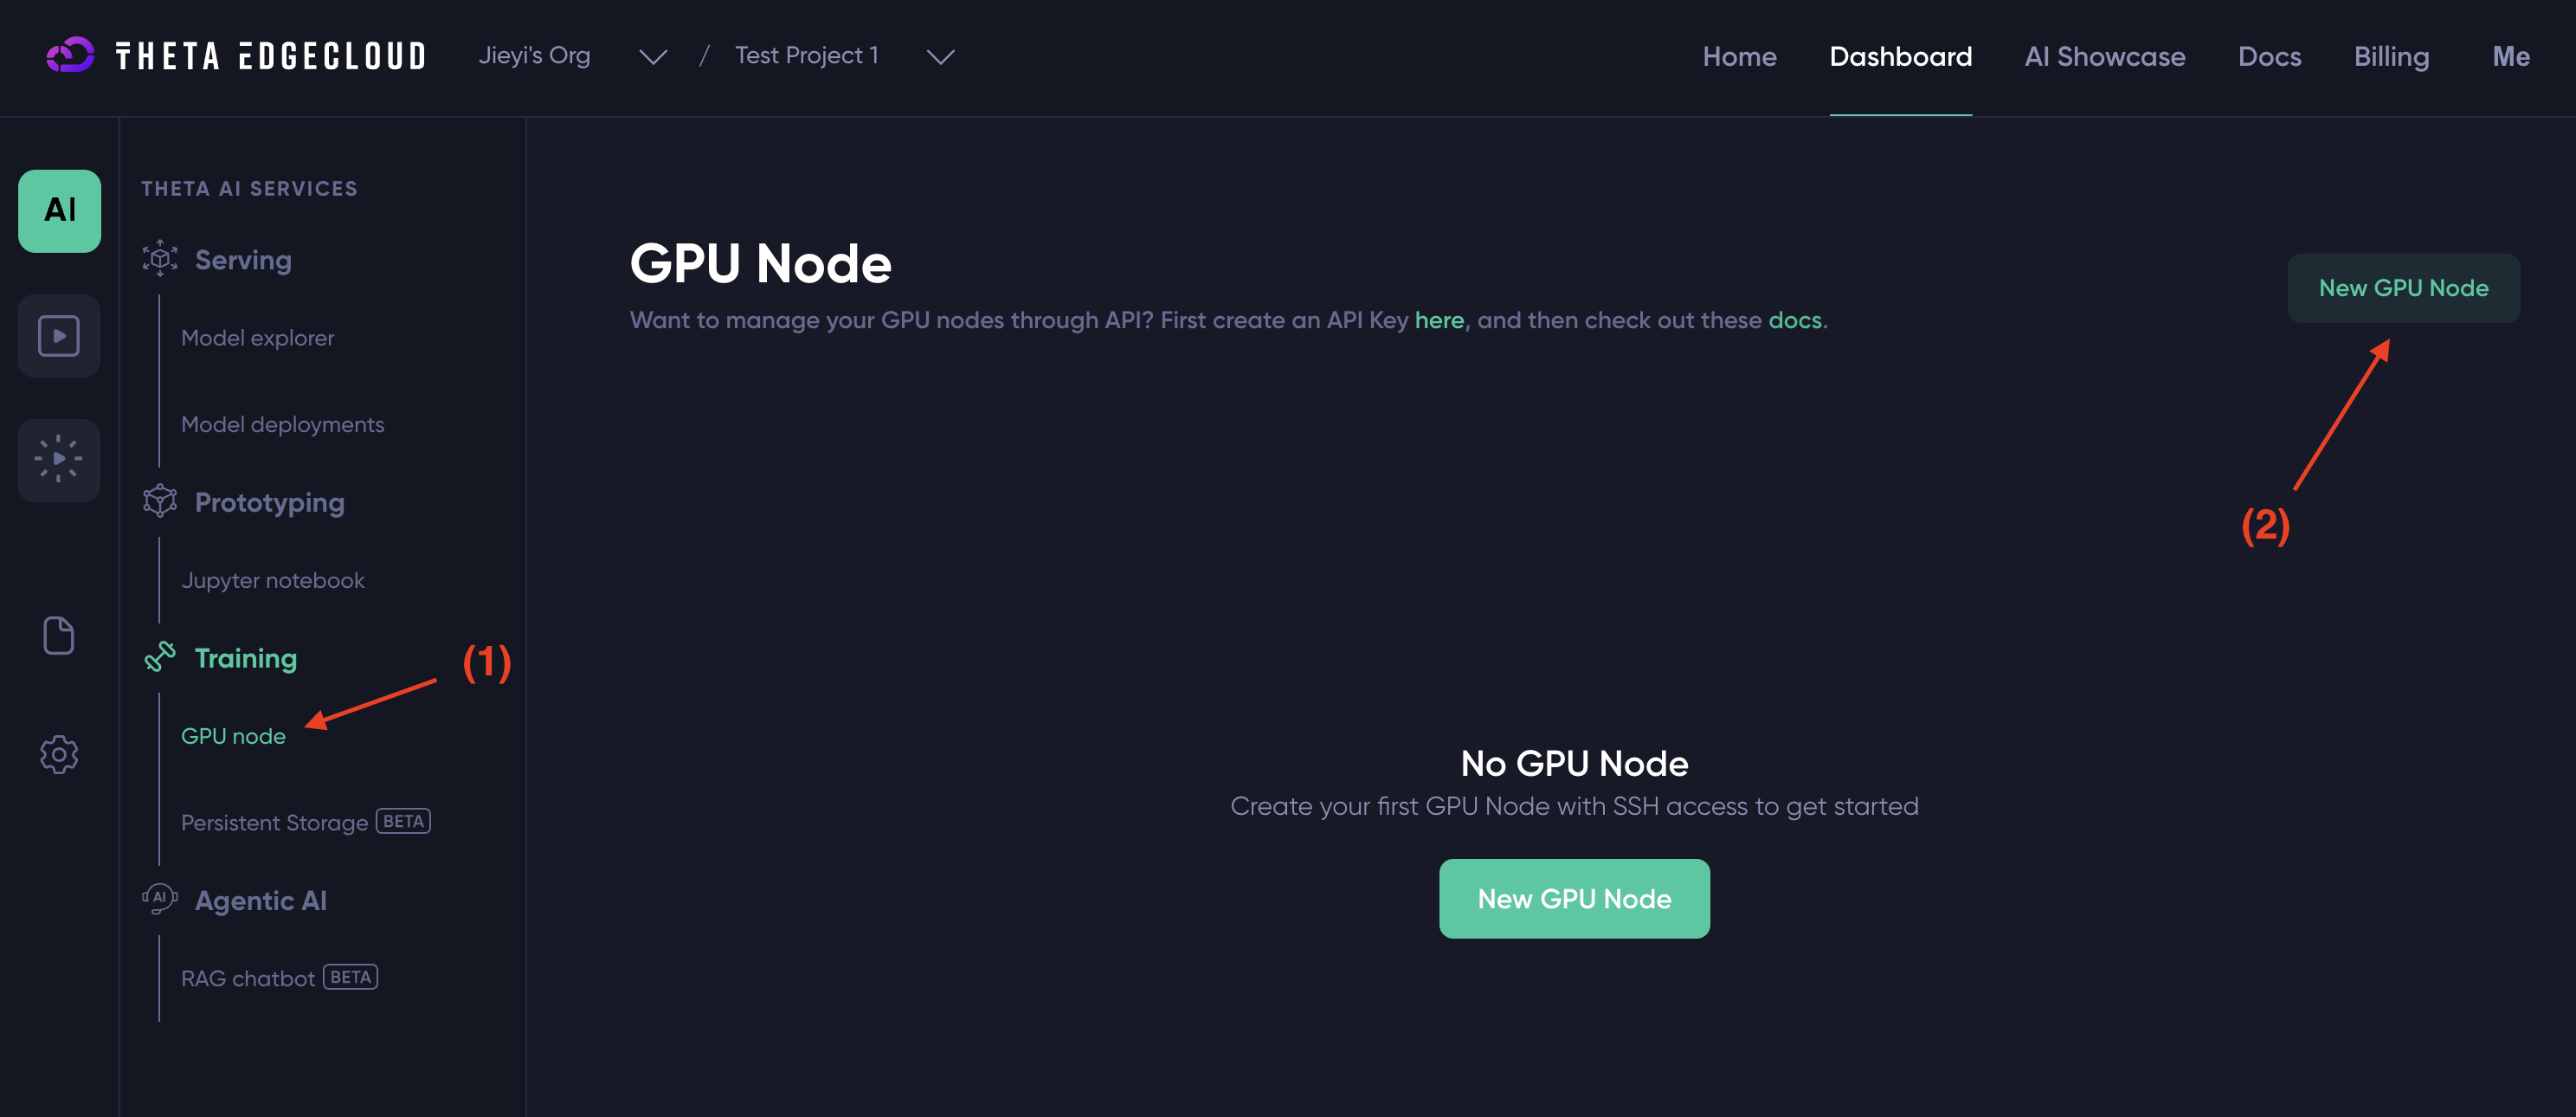
Next, click on "New GPU Node". You should see the a modal like below popping up which will guide you through the 3-step process to create a GPU node:
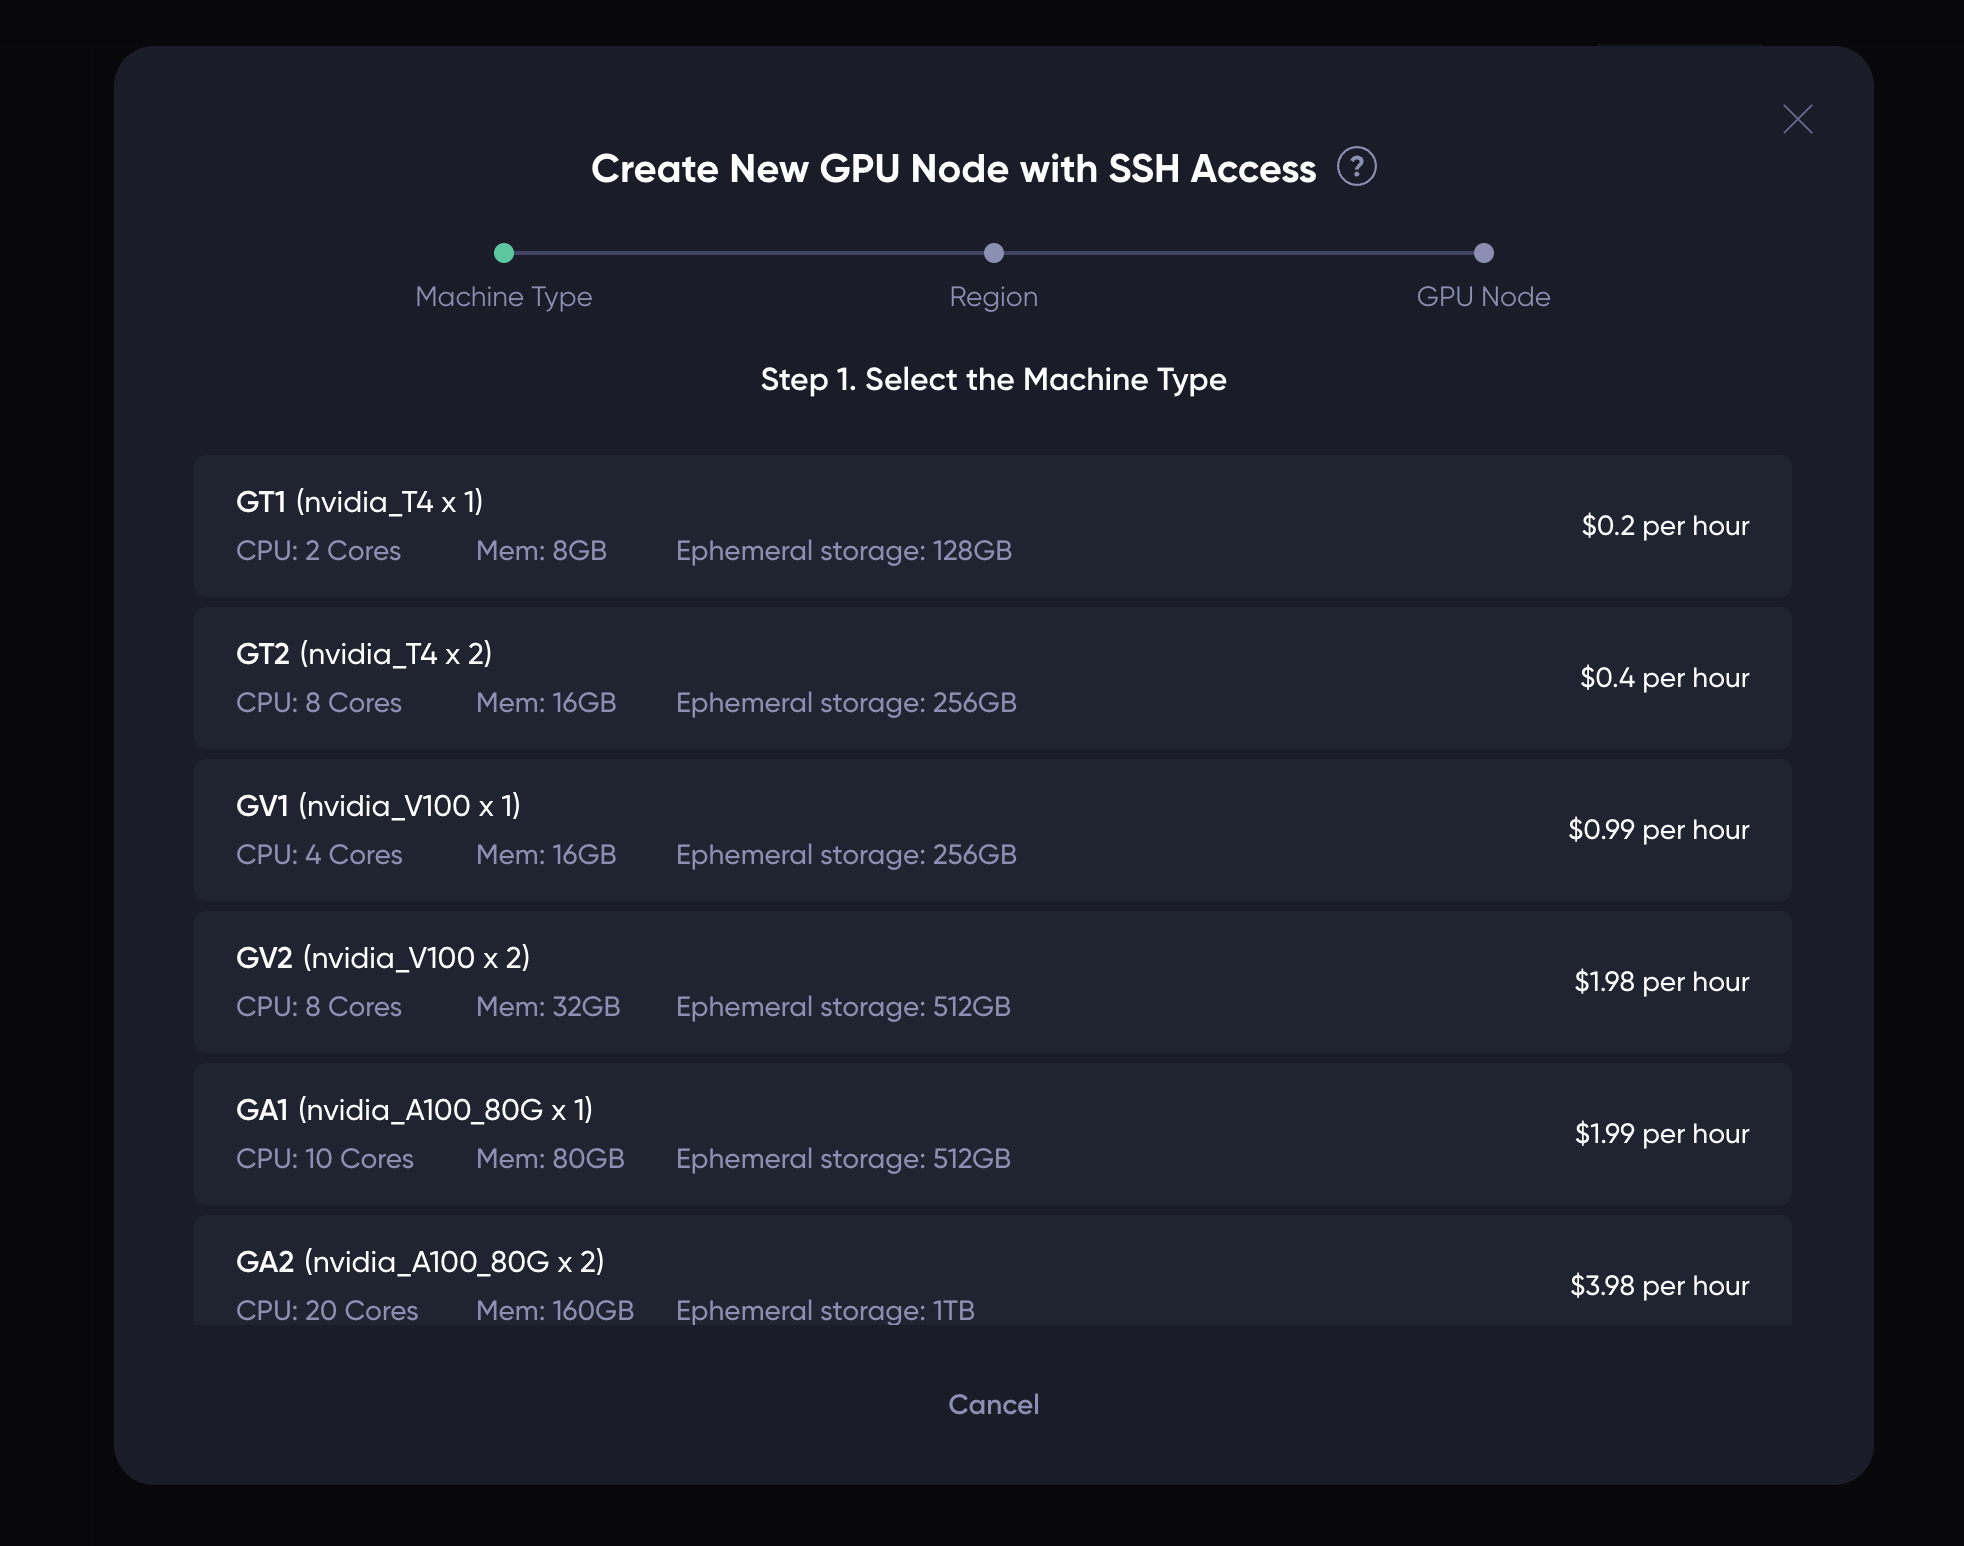
For the first step, simply click on the type of machine you want to use.
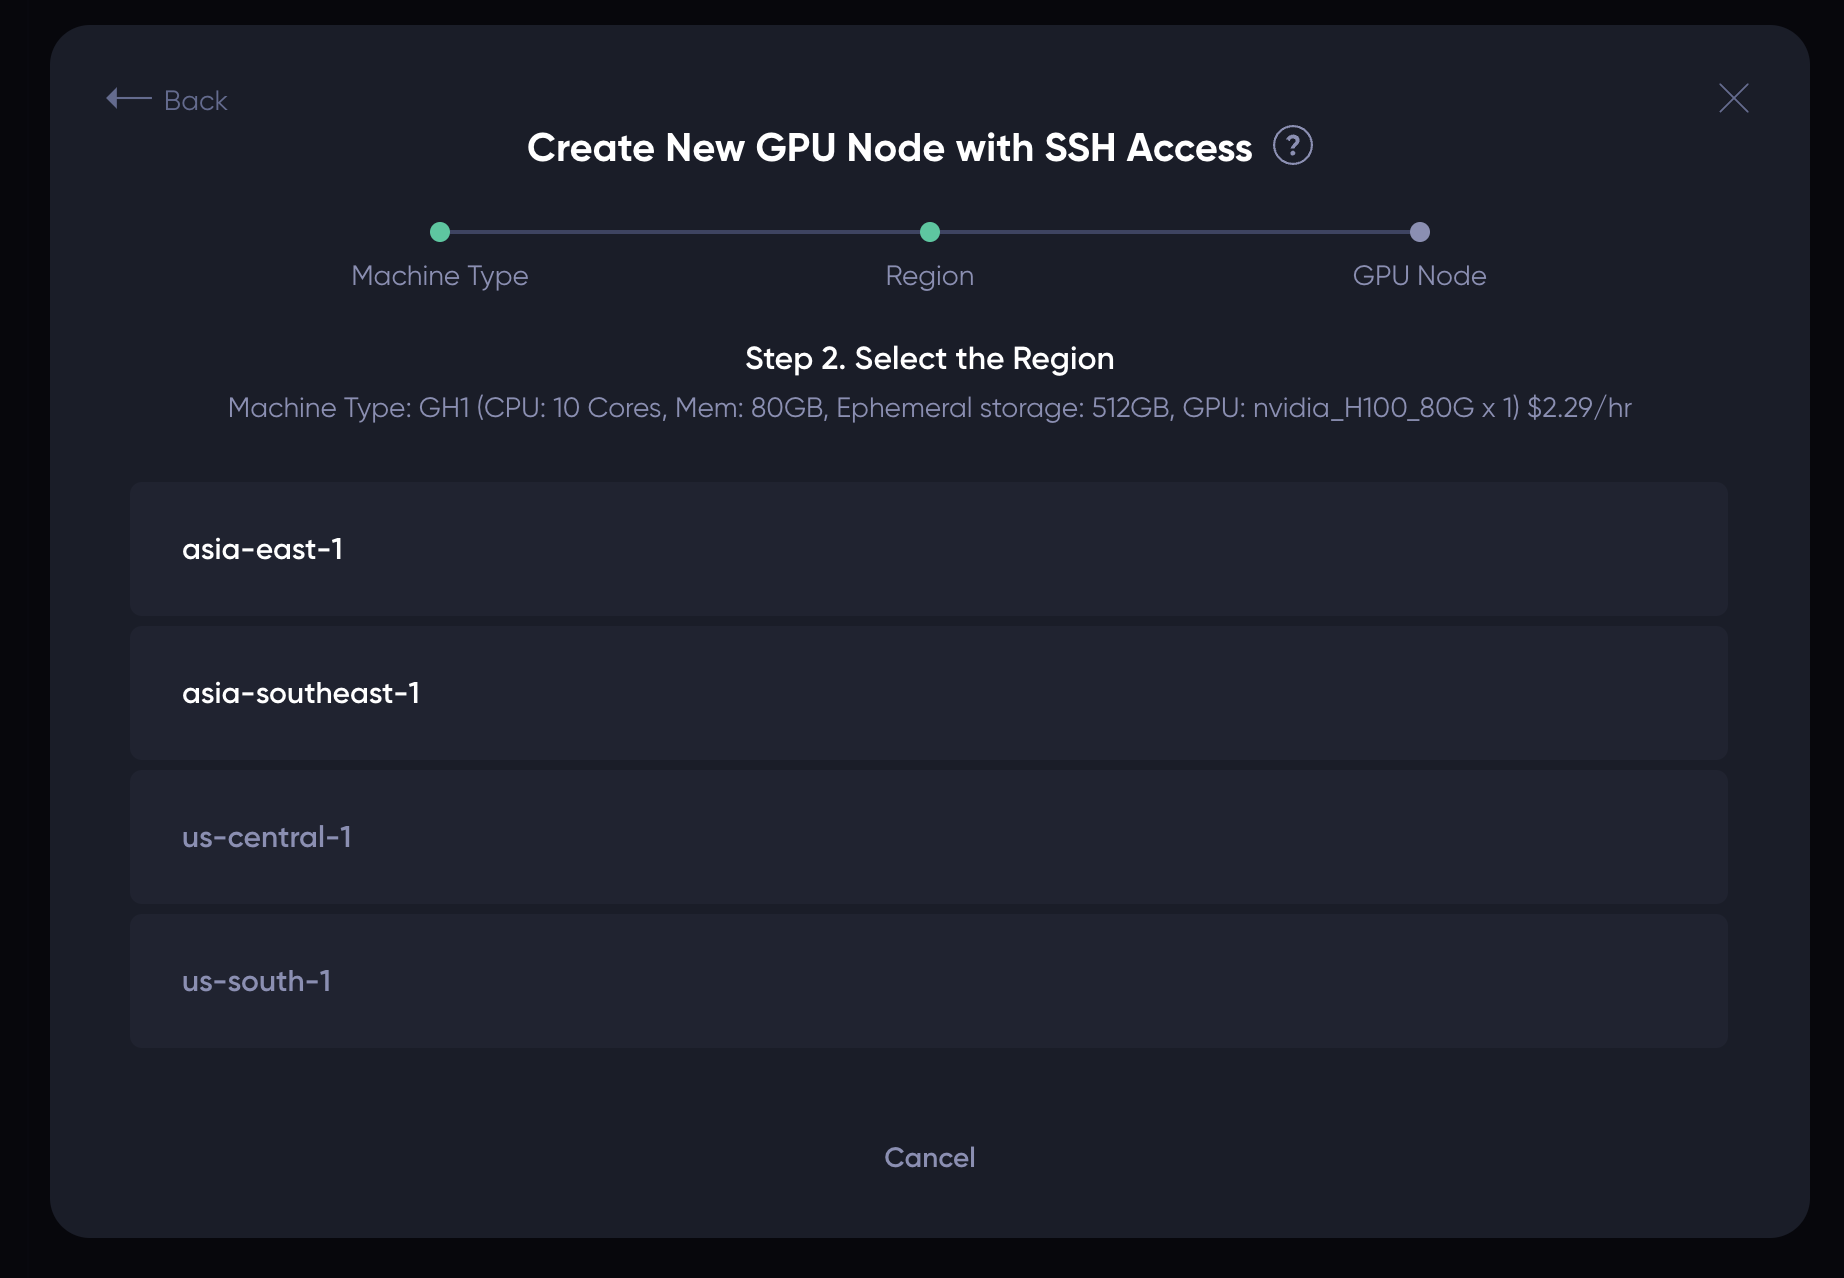
The second step shows the regions where the type of machine chosen are available. For example, the GPU machine type we chose in the first step is available in region asia-east-1 and asia-southeast-1. Click on the region where you want to launch the GPU node, and the following UI should show up:
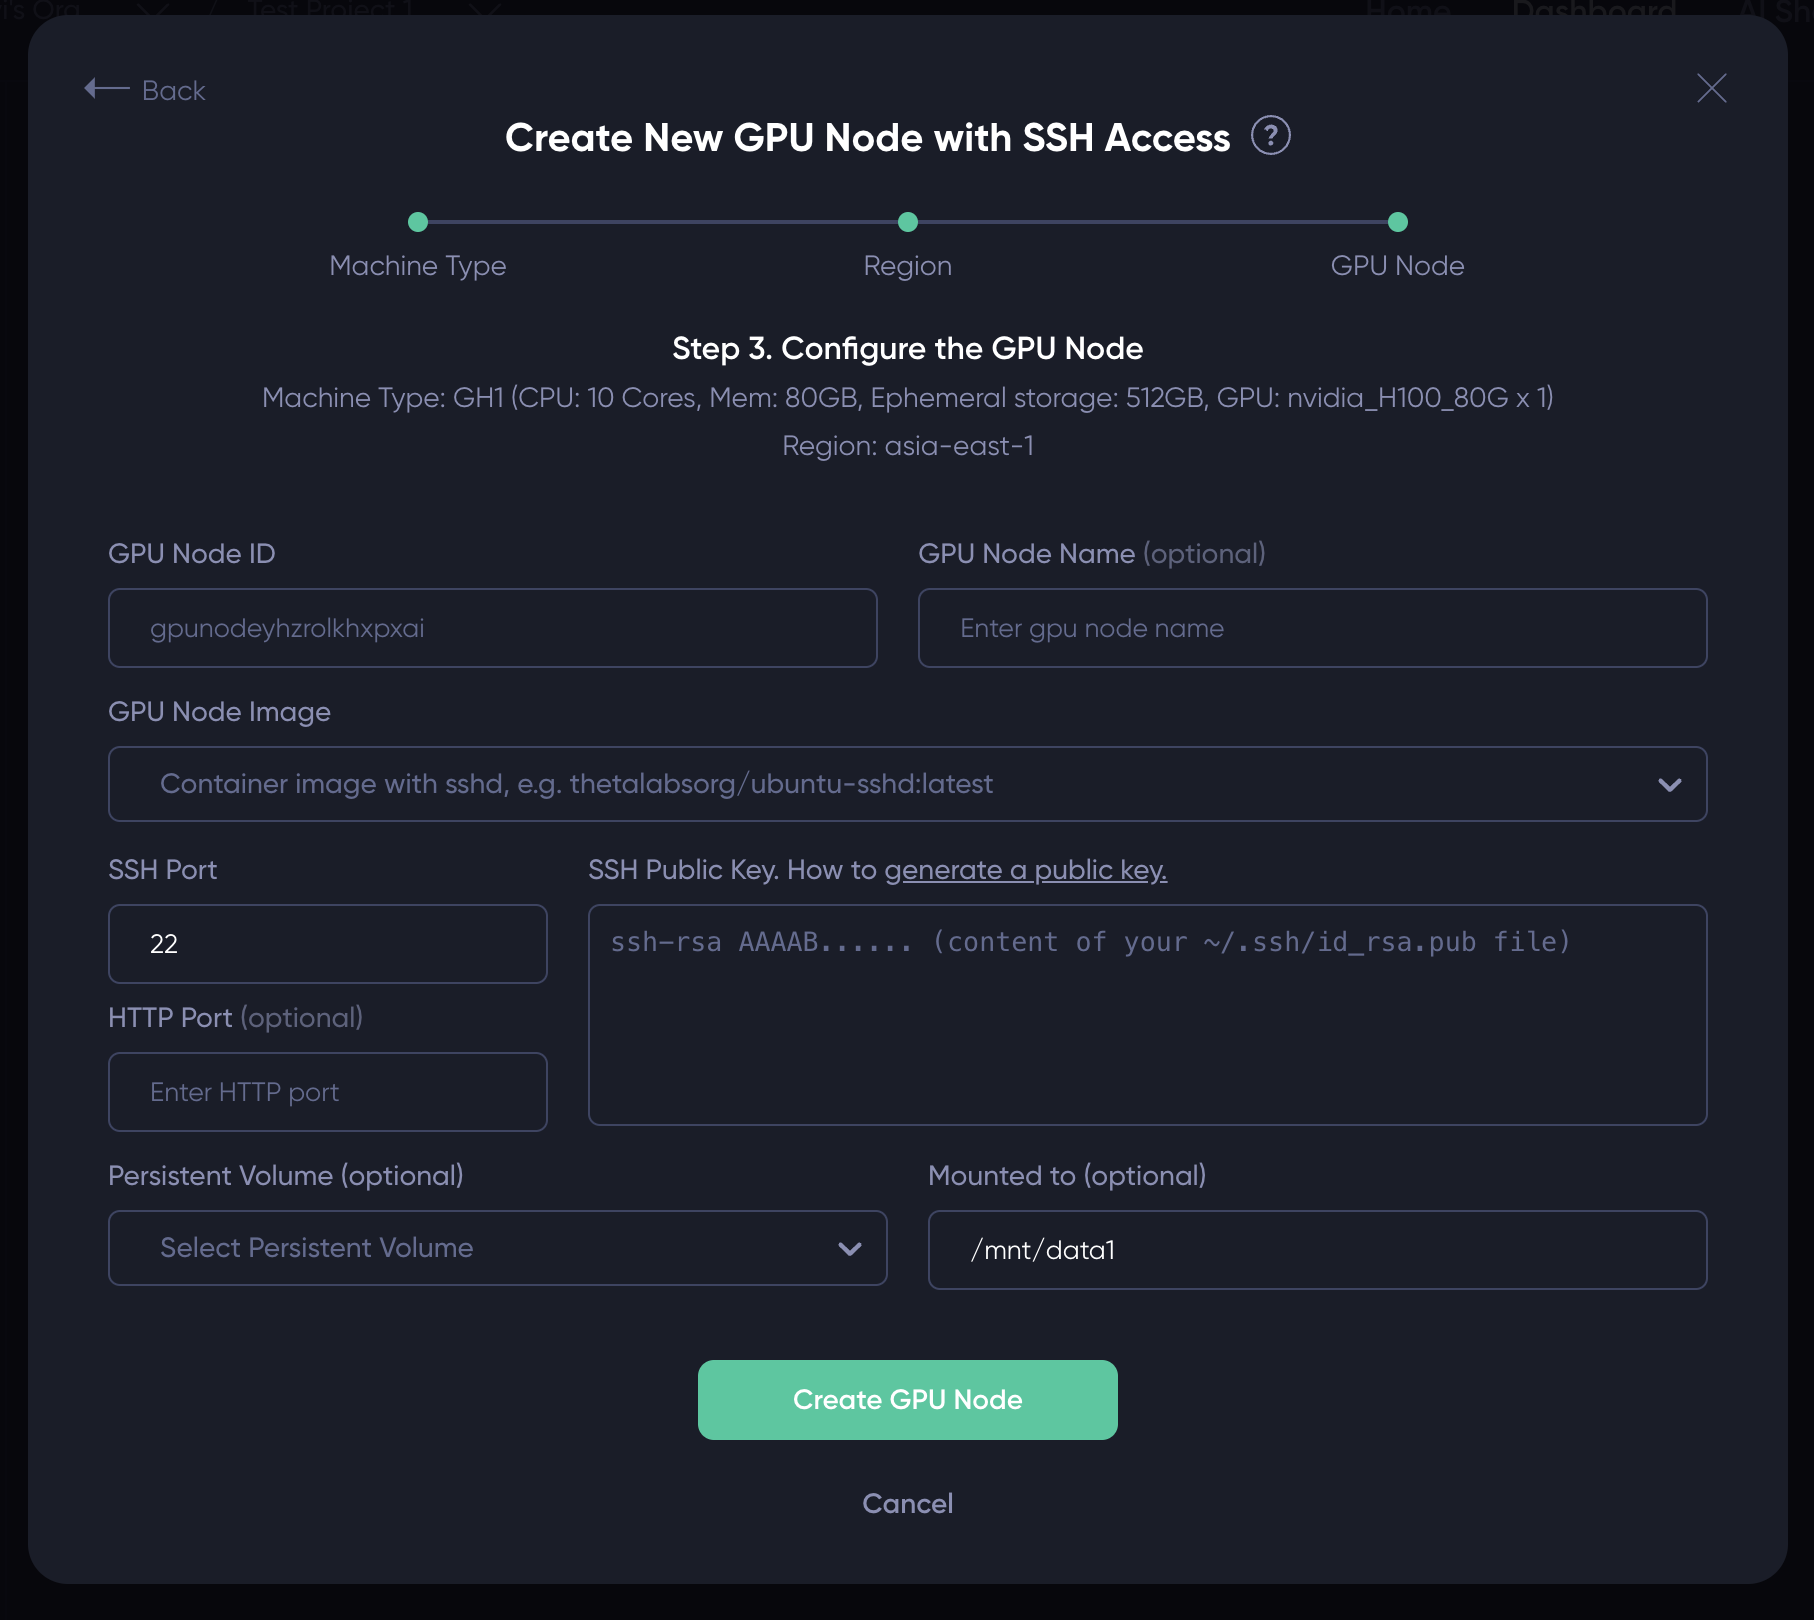
Most fields on the UI are self-explanatory. In particular:
GPU Node ID: this is a read-only field generated automatically.GPU Node Name(Optional): you can specify a name for the node in the "GPU Node Name" field. You can also leave it blank update the name later after the node is launched.GPU Node Image(Required): You need to specify the container image for the GPU node in the "GPU Node Image" field. The image needs to be a container withsshdrunning in the background. Otherwise you will not be able to SSH to the node. You can either type in the container URL (e.g.thetalabsorg/ubuntu-sshd:latest), or select an image image we prepared from the drop-down list.SSH port(Required): This is the port thesshdprocess in the container listens to. By default it is 22. If yoursshdprocess is using another port, please update this field accordingly.SSH Public Key(Required): Please paste your SSH public key here, which is a long string starting withssh-rsa. The RSA public is typically stored in your~/.ssh/id_isa.pubfile. Please checkout this link on how to generate your SSH public key.HTTP Port(Optional): This field is empty by default. However, if you have an HTTP server running in your container (e.g. Jupyter notebook, TensorBoard server), you can specify the port it listens to. We will map it to an HTTPs endpoint for you to interact with the server (see Note 2 in the "Tips" section).Persistent Volume: This allows you to mount a persistent volume to the GPU node. Note that only the persistent volumes created in the same region can be mounted. Please choose the available volumes from the dropdown list, or create a new volume on the spot. Please learn more about how to create a persistent volume here.Mounted to: The mount point of the persistent volume. By default it is/mnt/data1but you can change it to any path you like.
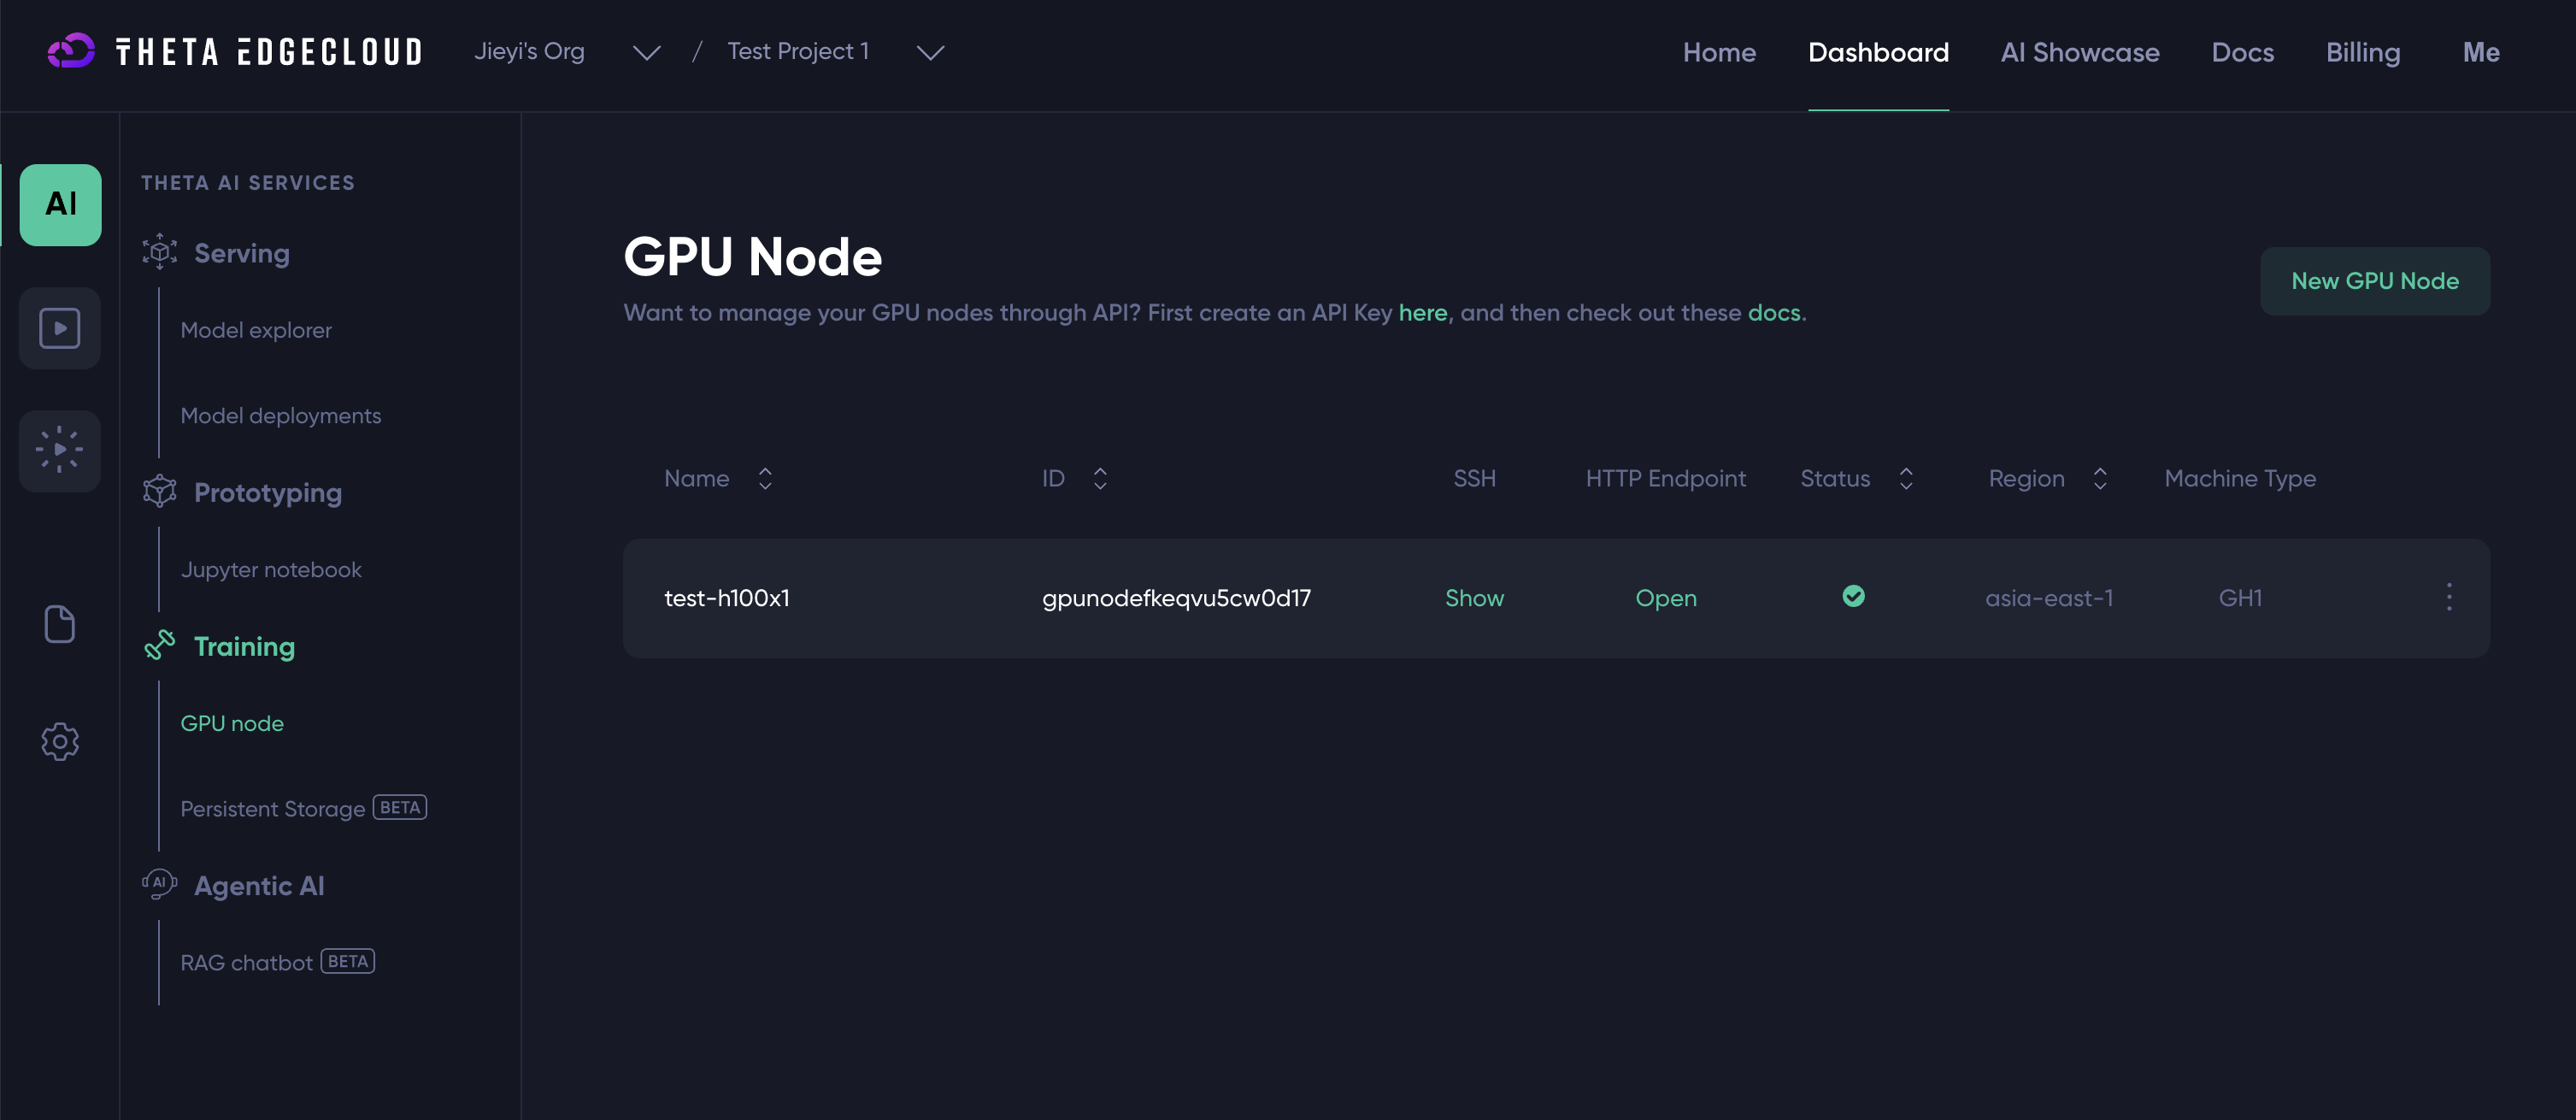
After filling in the above fields, please click on the "Create GPU Node" button to launch the GPU node, which should also redirect you to a page similar to the following:
1.2 SSH to the GPU Node
Depending on the size of the container image, it may take a few minutes to fire up the GPU node. Once it is up and running, you can connect to the node via SSH. Simply click the green "Show" button in the above screenshot to see the SSH command:
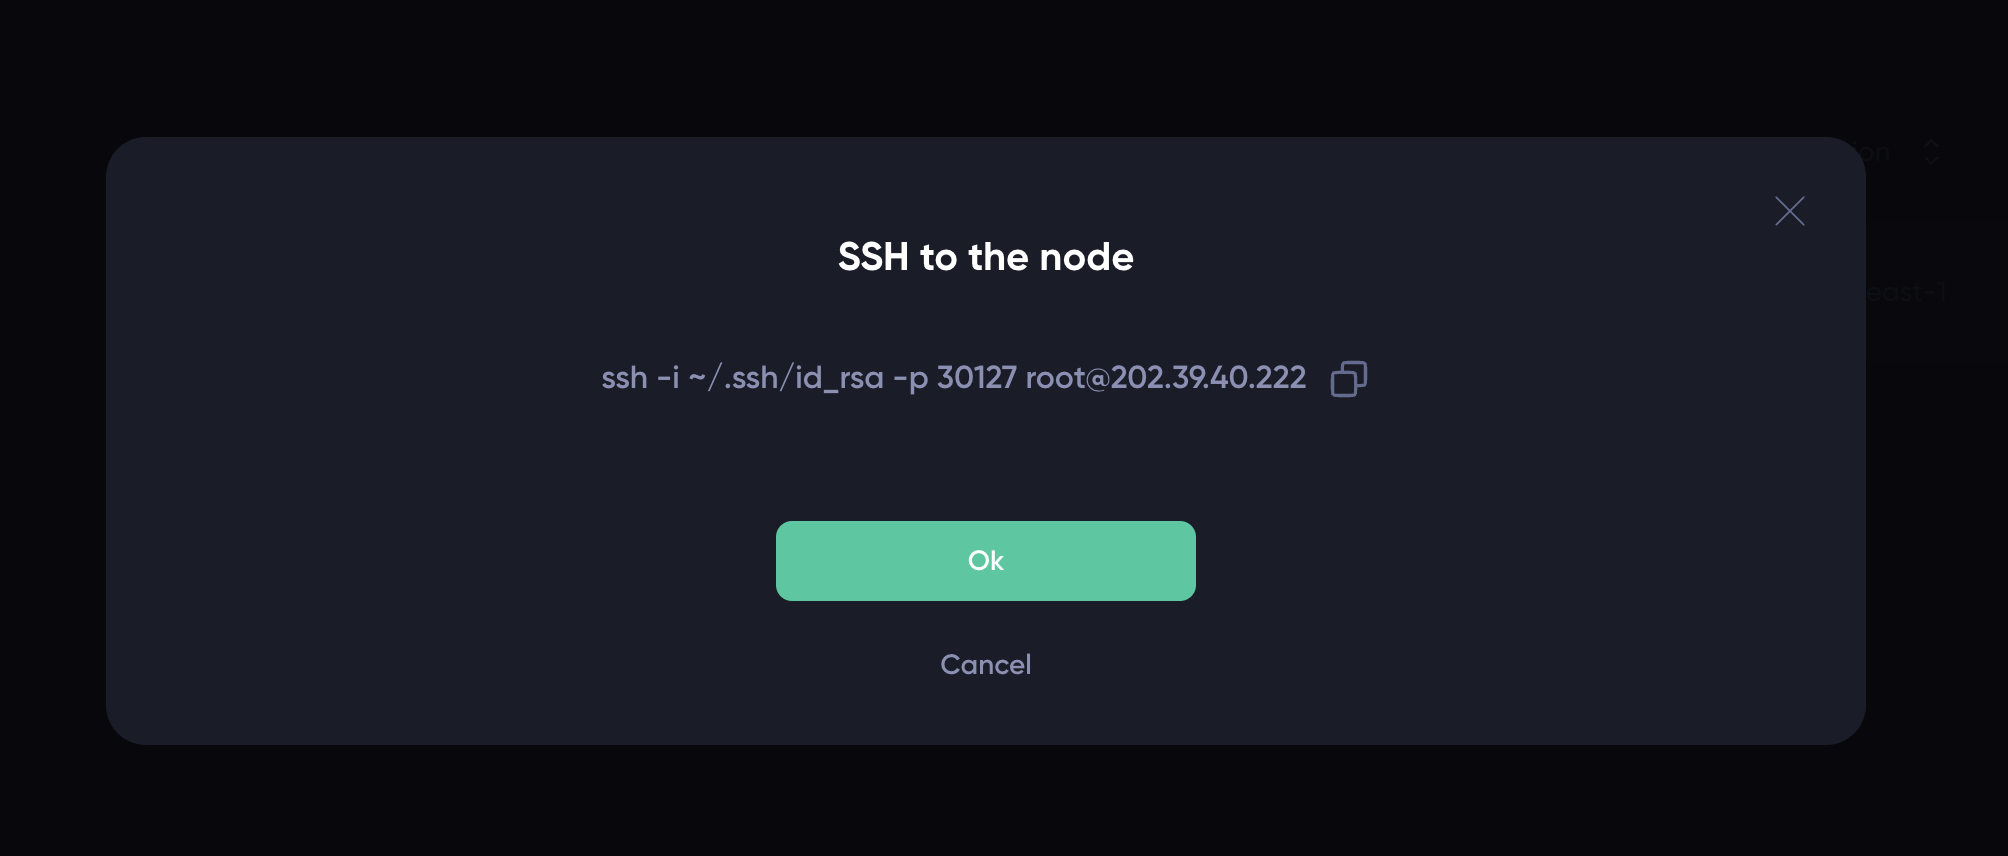
Now, you can copy the ssh command to your local terminal to connect to the GPU node. If your SSH private key is stored in another file other than ~/.ssh/id_rsa, please specify the correct path:
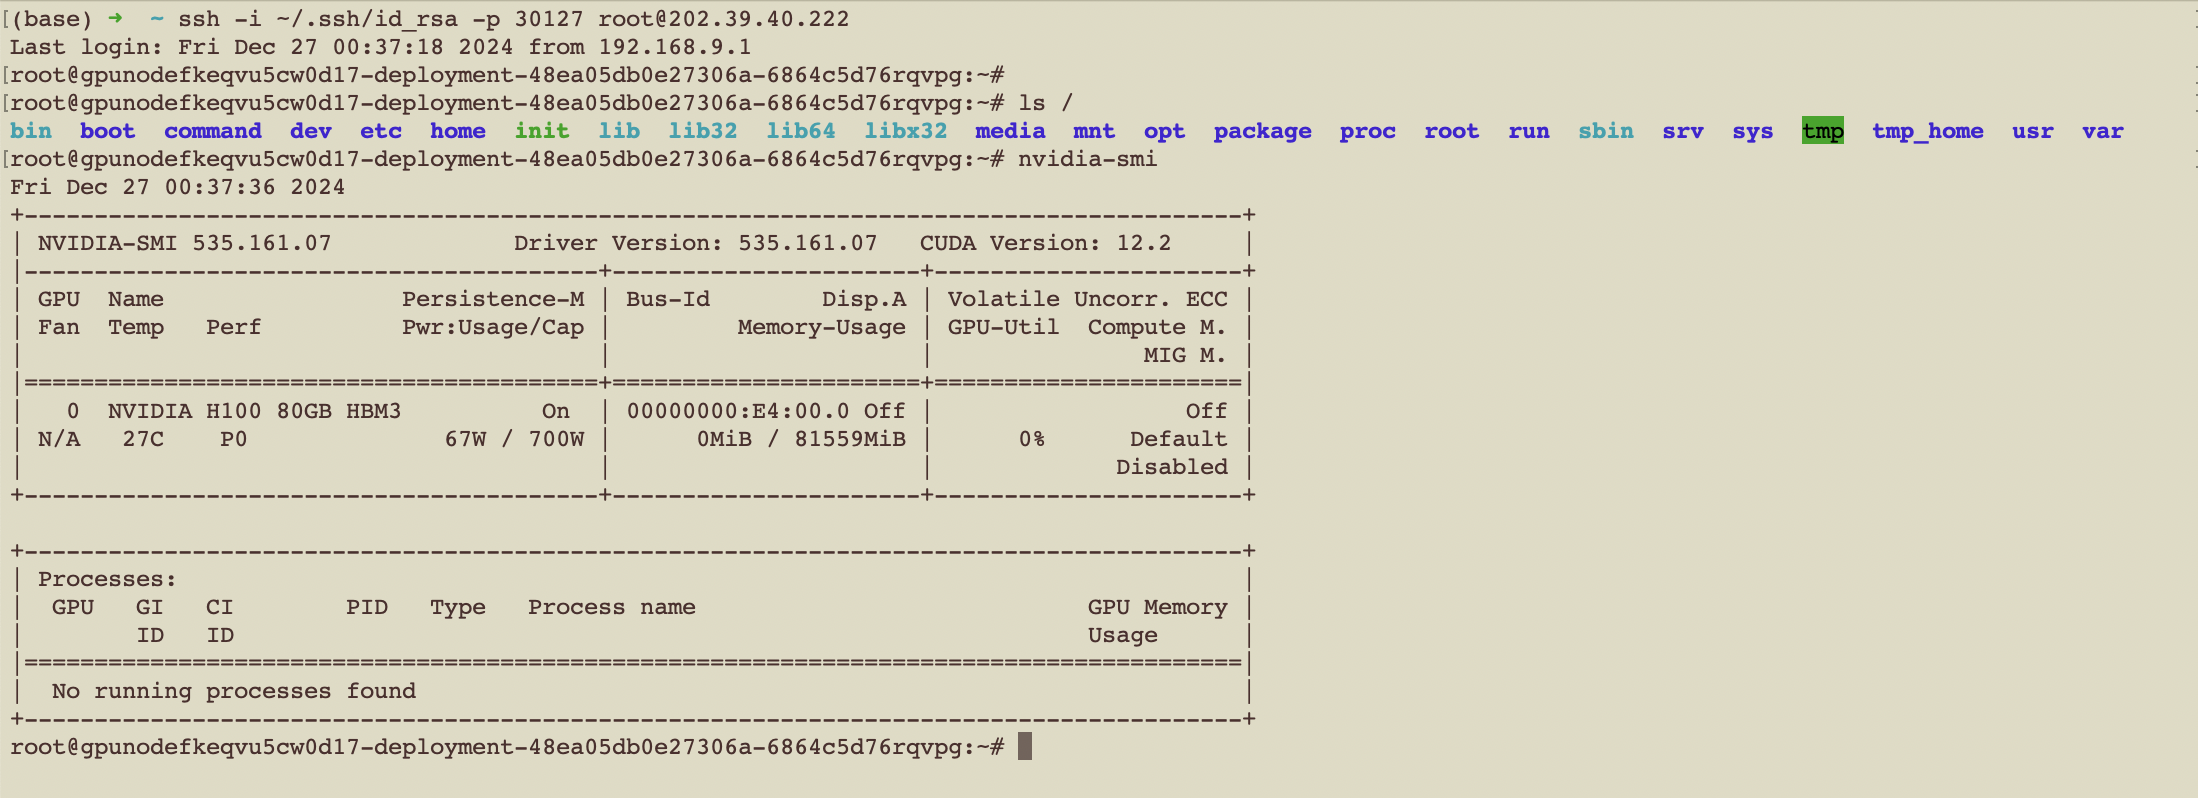
Enjoy the high performance GPU nodes provided by Theta EdgeCloud! You can run model training or any other computational tasks there freely.
1.3 Tips for Using the GPU Node
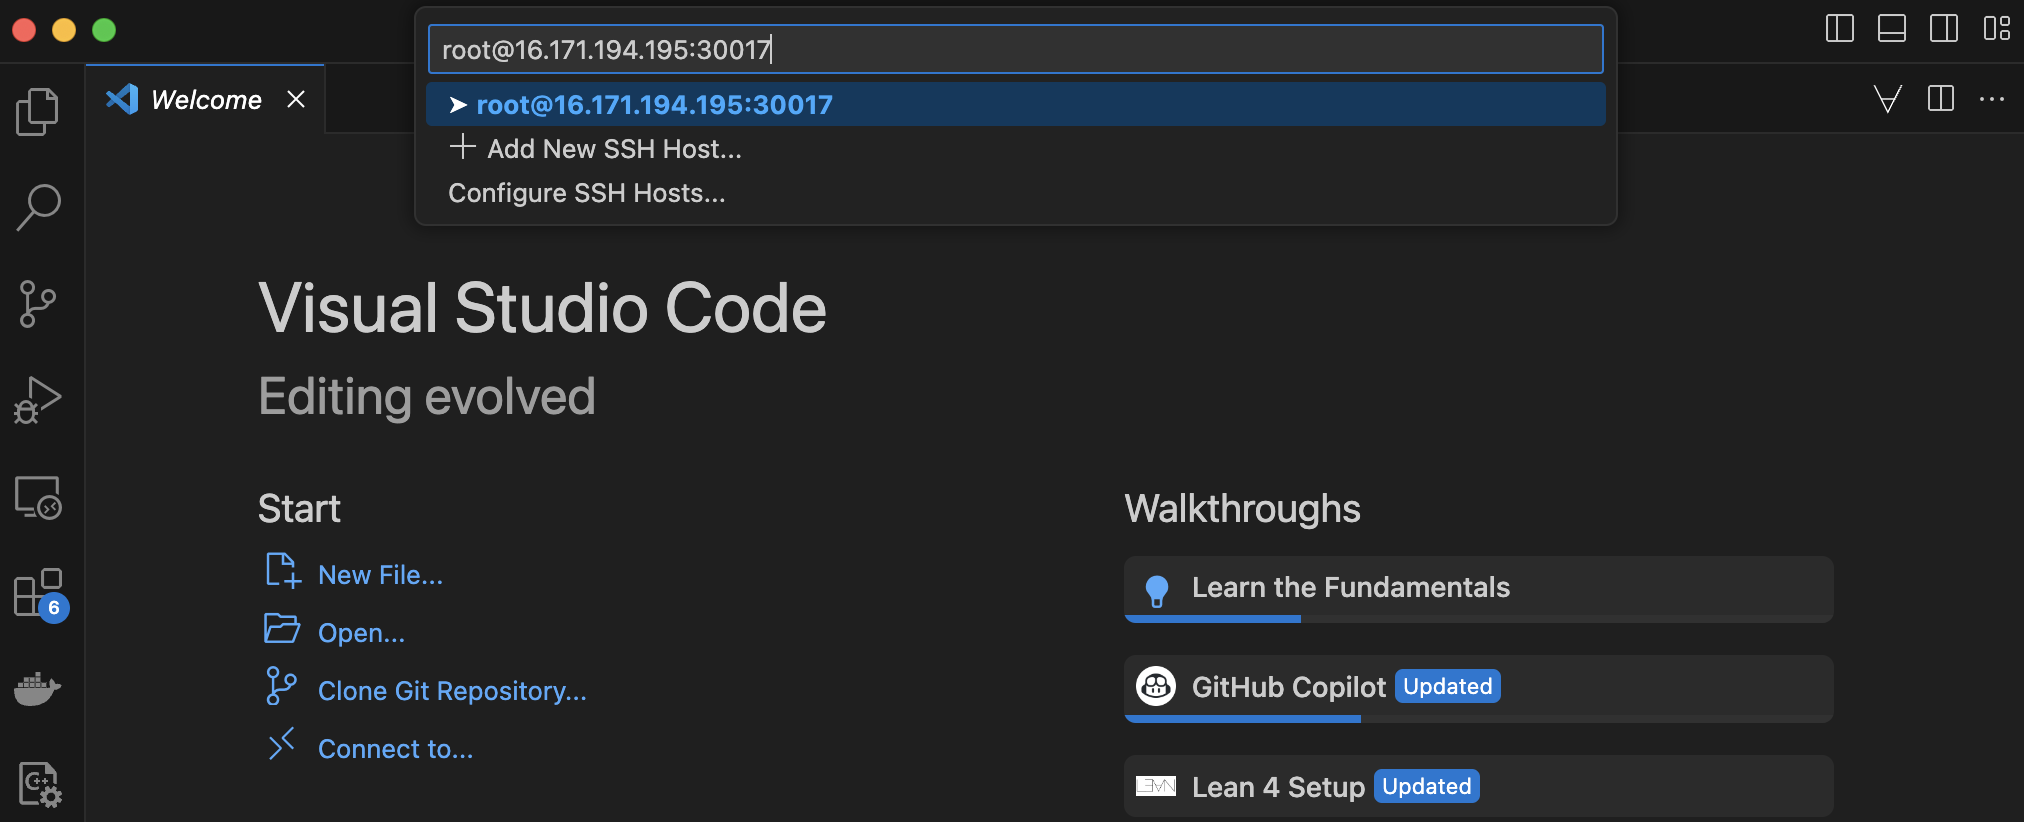
Note 1: You can also connect to the GPU node from IDEs such as Microsoft VSCode. Please learn more in this link. The SSH server URL should have this format user@IP:port. In the above example, the server URL would be [email protected]:30017.
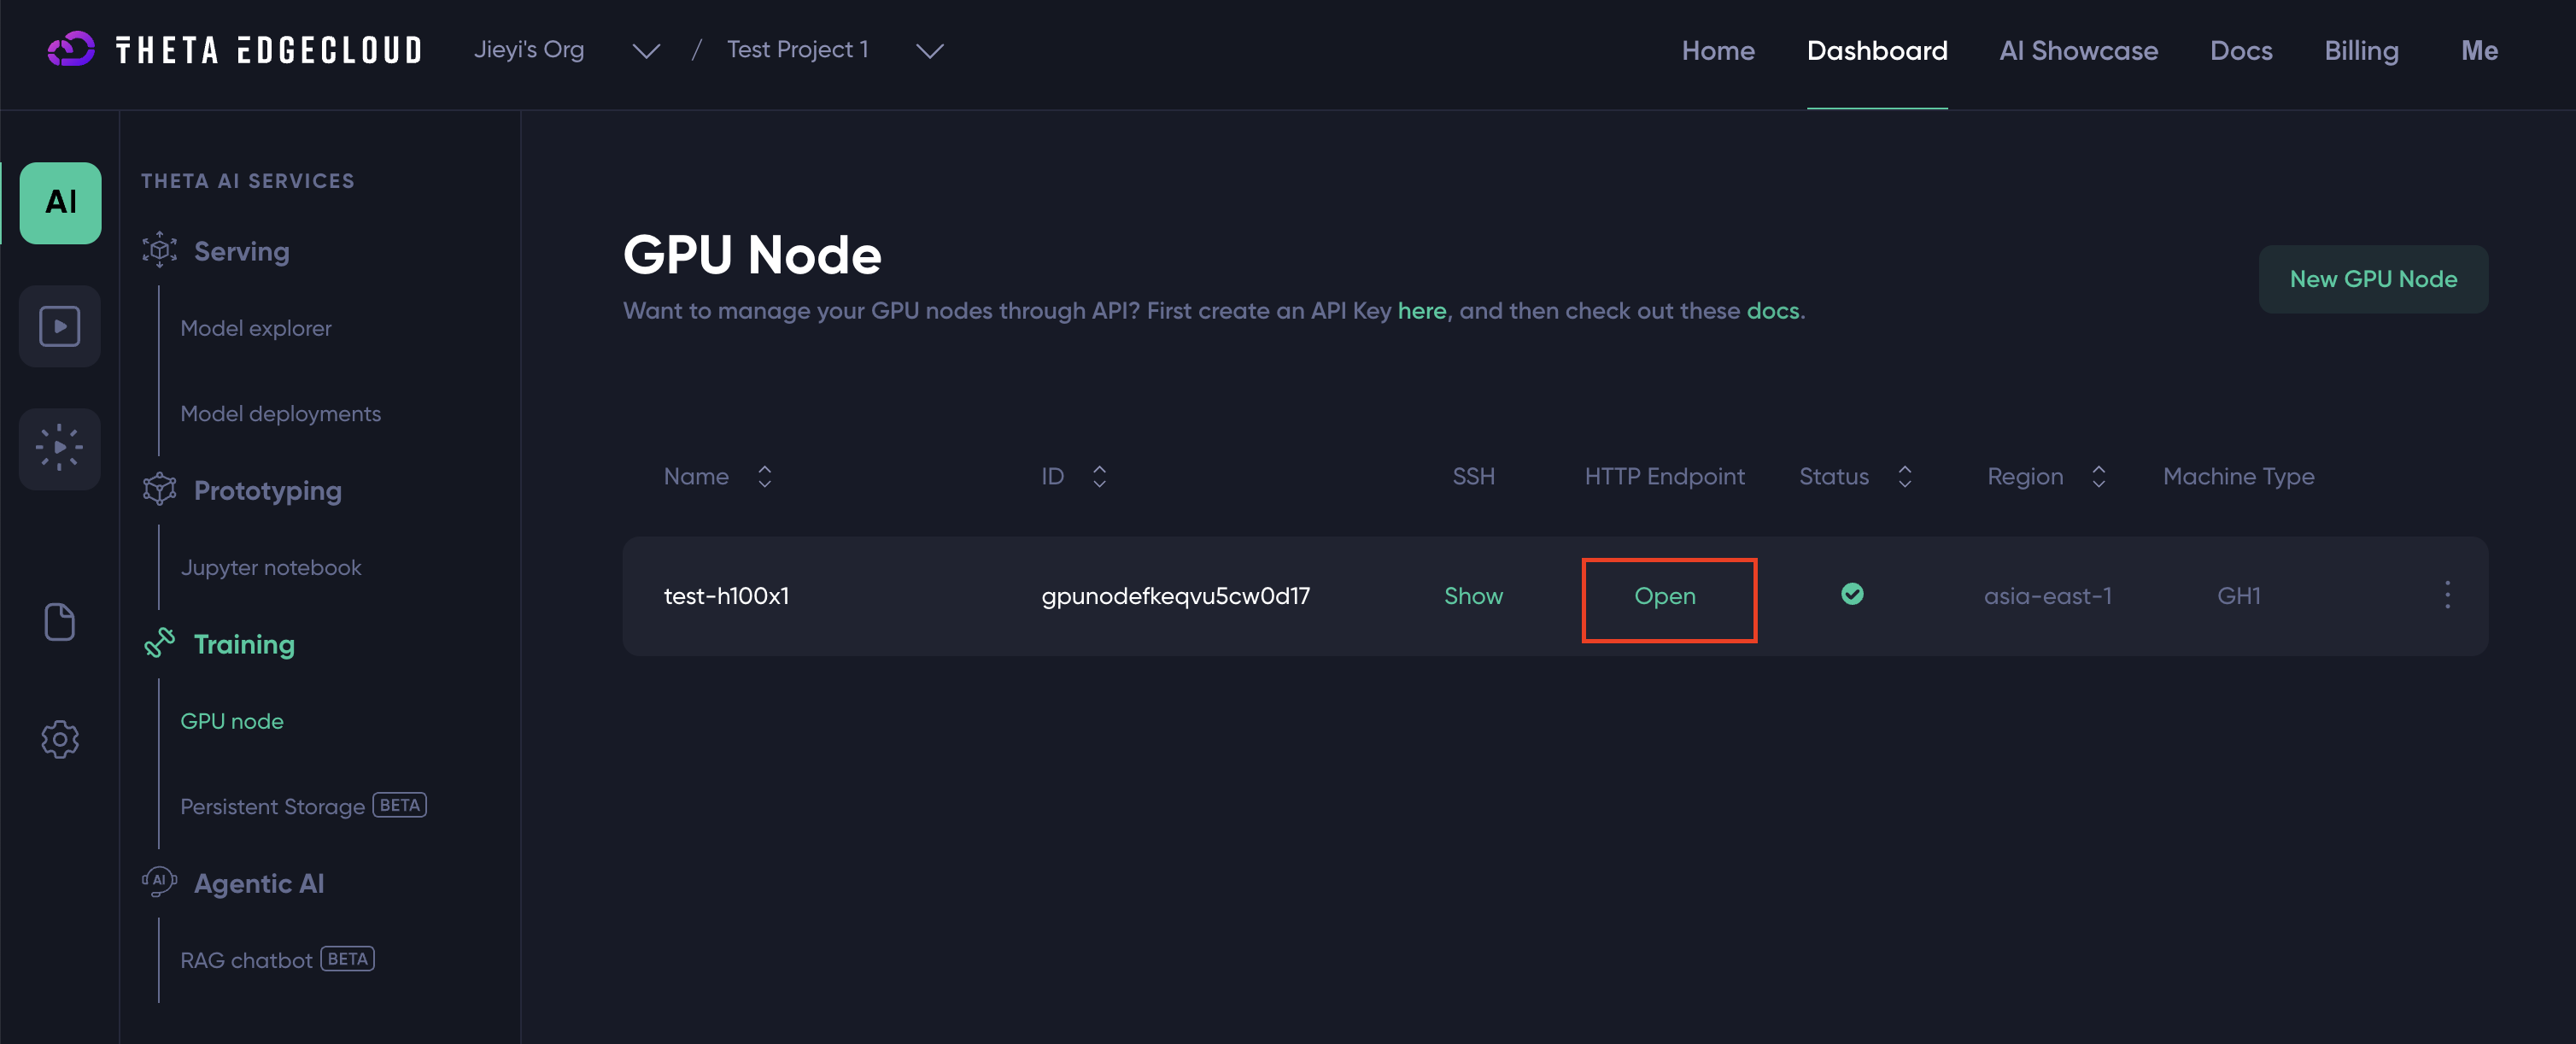
Note 2: If you specified the HTTP port, the "Open" button in the following screenshot will also turn green once the HTTP server is ready. Click on the button will open the HTTP endpoint in a new browser tab. For example, in the screenshot below, the GPU node named gpu node with jupyter notebook runs the Jupyter notebook server in the container. Once the server is up, you can click on "Open" to access the Jupyter notebook.
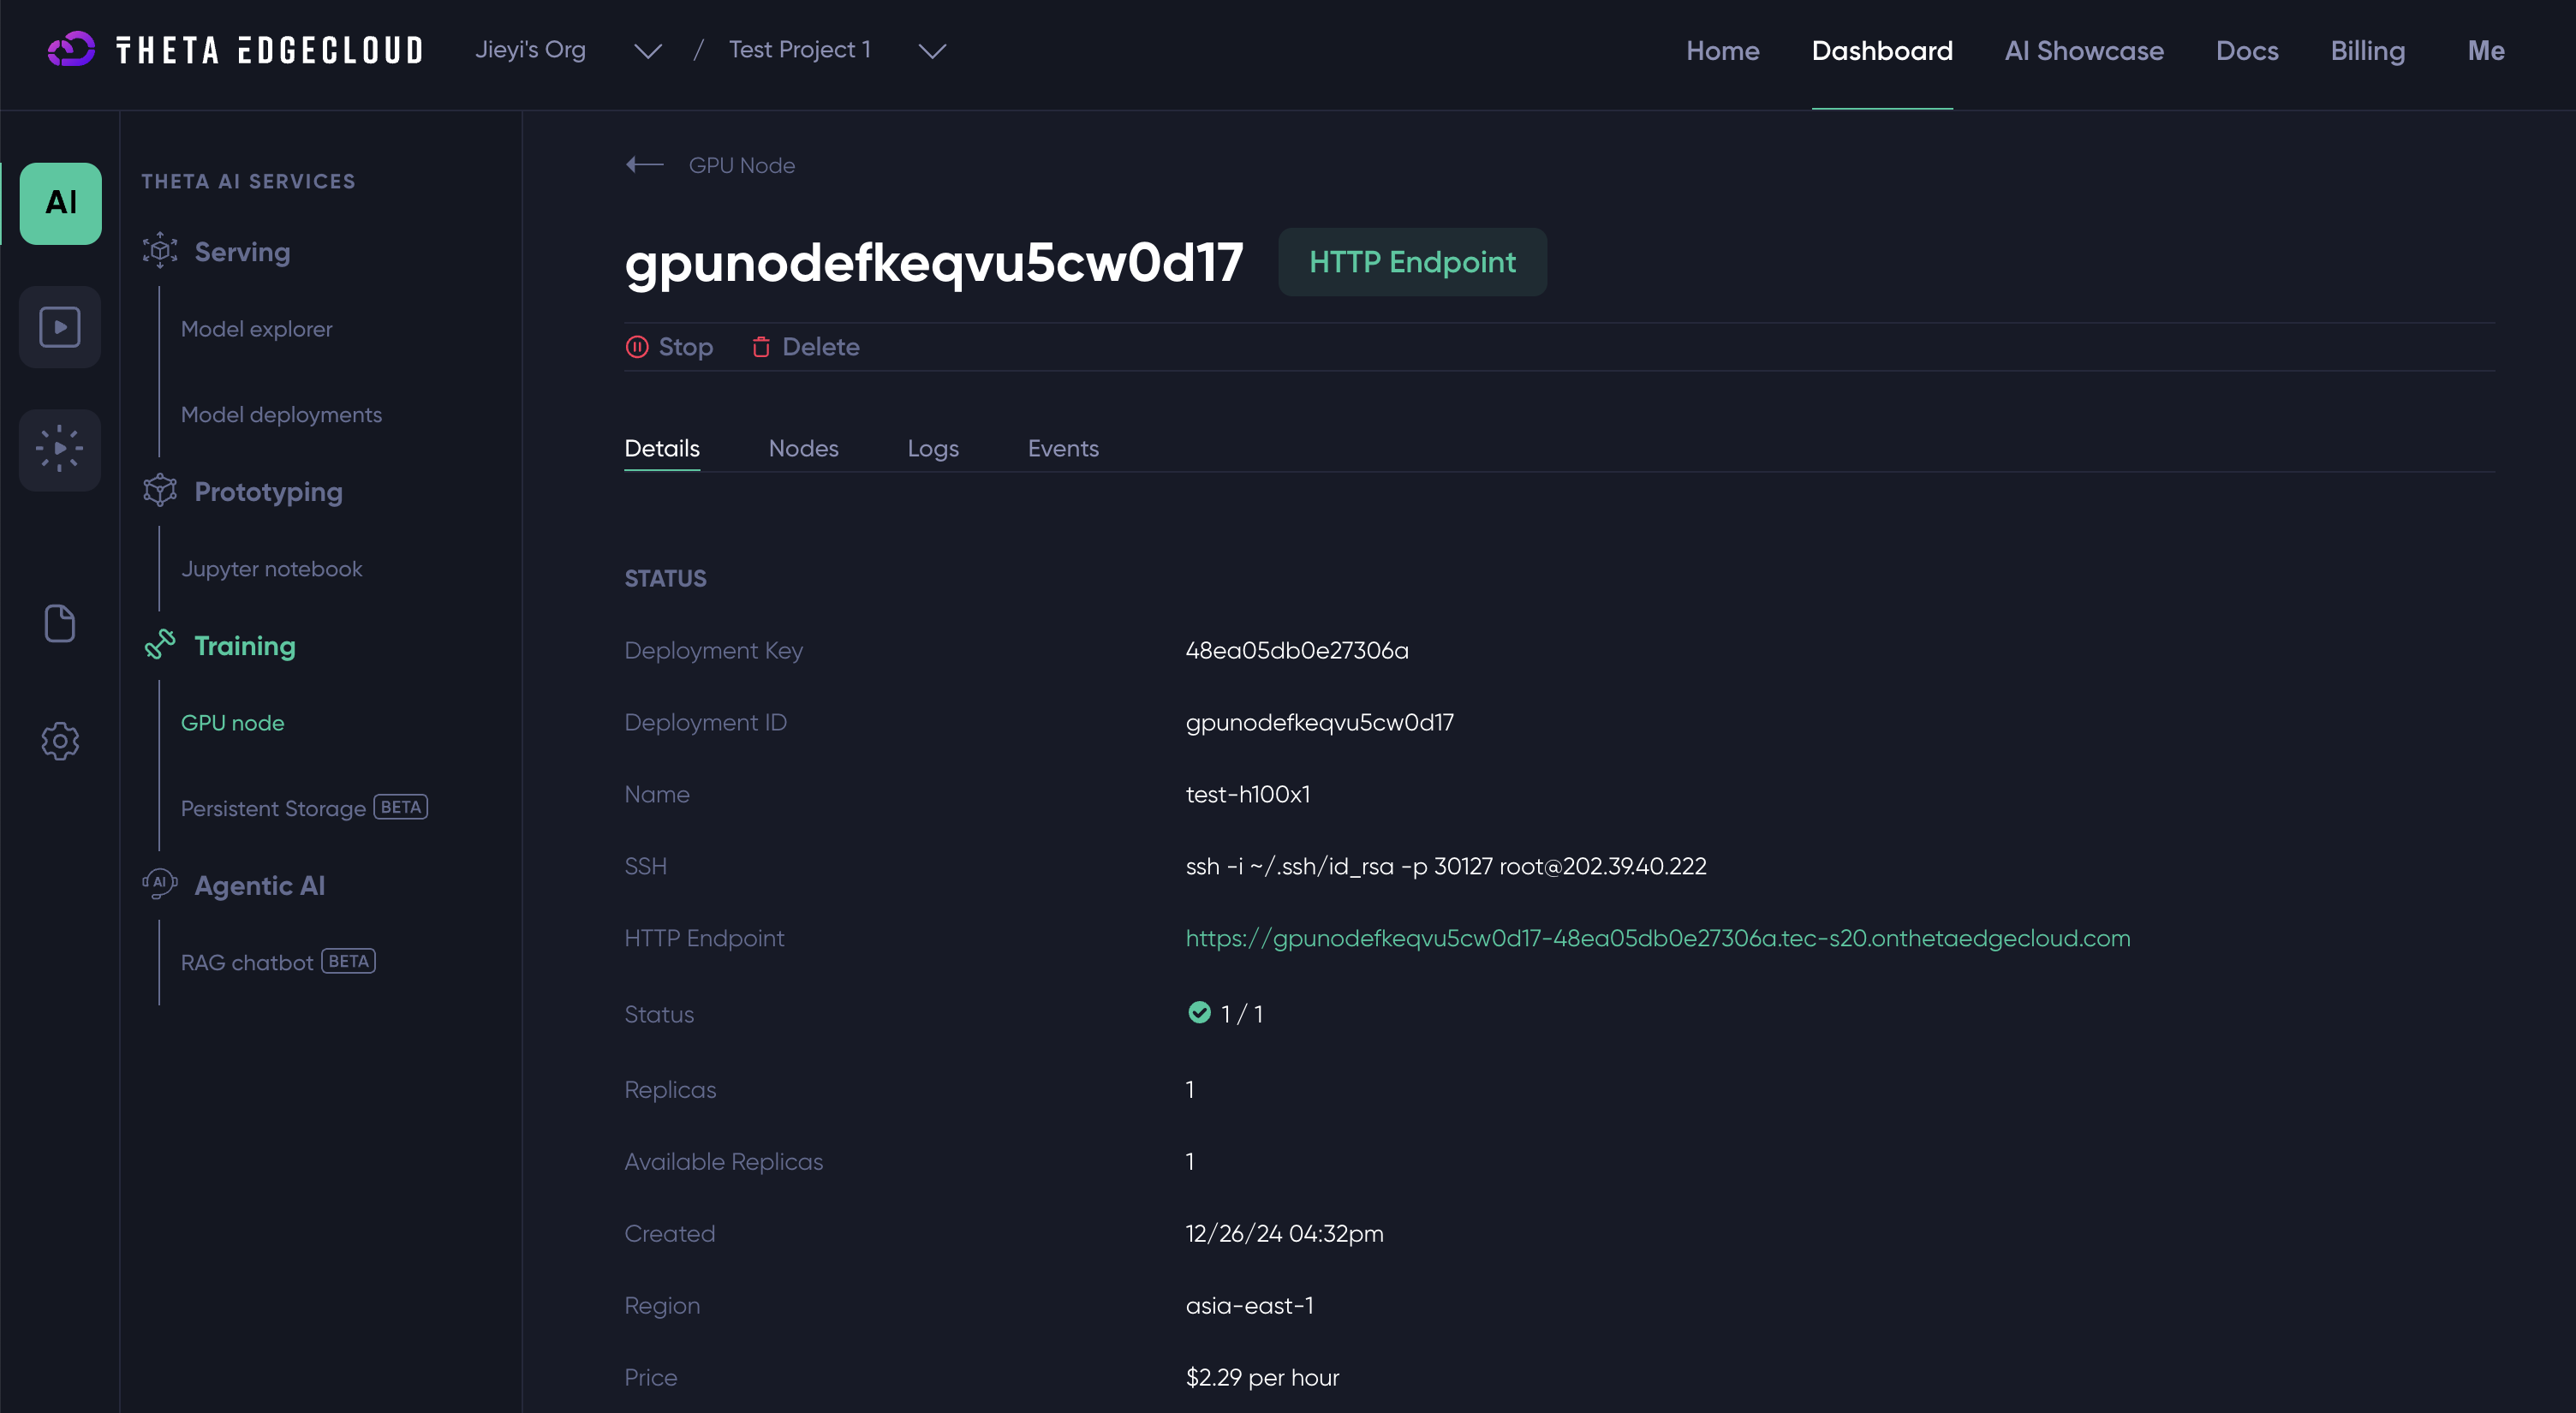
Note 3: You can click into the GPU node to see view more details, the GPU node status, the container logs (if it prints anything), and events. The "Events" tab is particularly useful for diagnosing the root cause of GPU node crashing events.
2. Stop and Restart a GPU Node
Users can stop and restart a GPU node. The system remembers the metadata of the GPU node (e.g. the container URL, port, machine type, etc) for the user to restart the GPU node later.
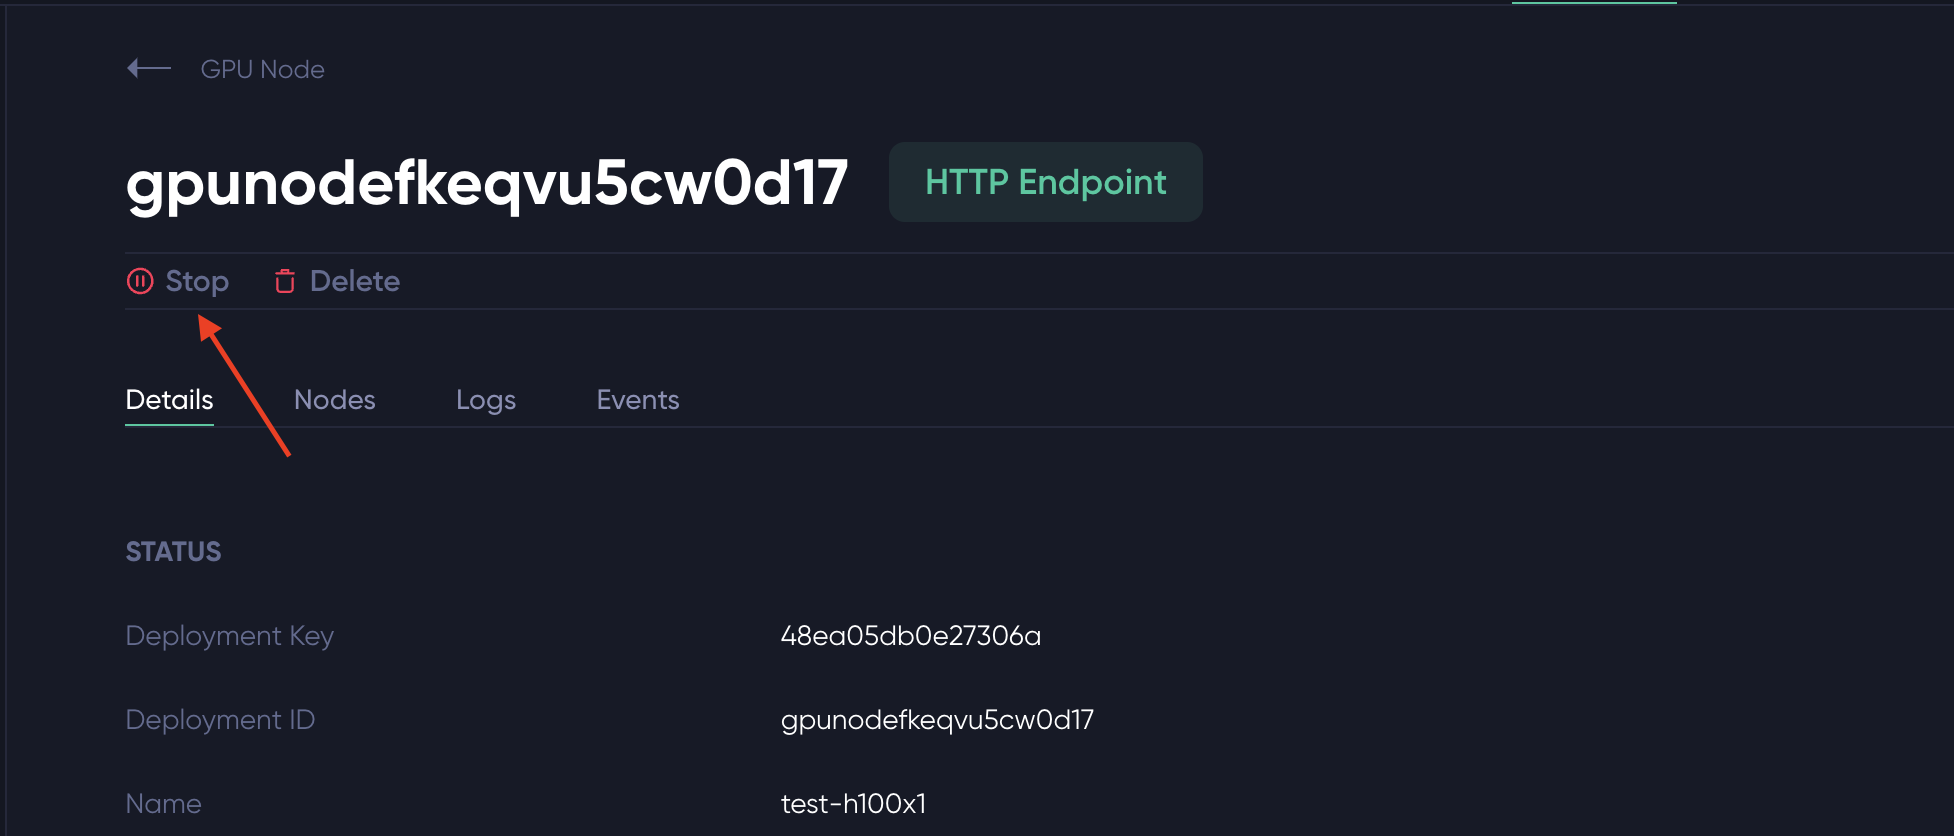
The GPU node can be stopped either from the node list page or the details page, as shown in the screenshots below:

Note that data stored in ephemeral storage will be lost when a GPU node is stopped. To ensure data preservation, we recommend attaching a persistent volume to your GPU node during its creation. Persistent volumes safely retain data even when the node is stopped. Please learn more about how to create a persistent volume here. You can attach a persistent volume to the GPU node when you create or reconfigure it.
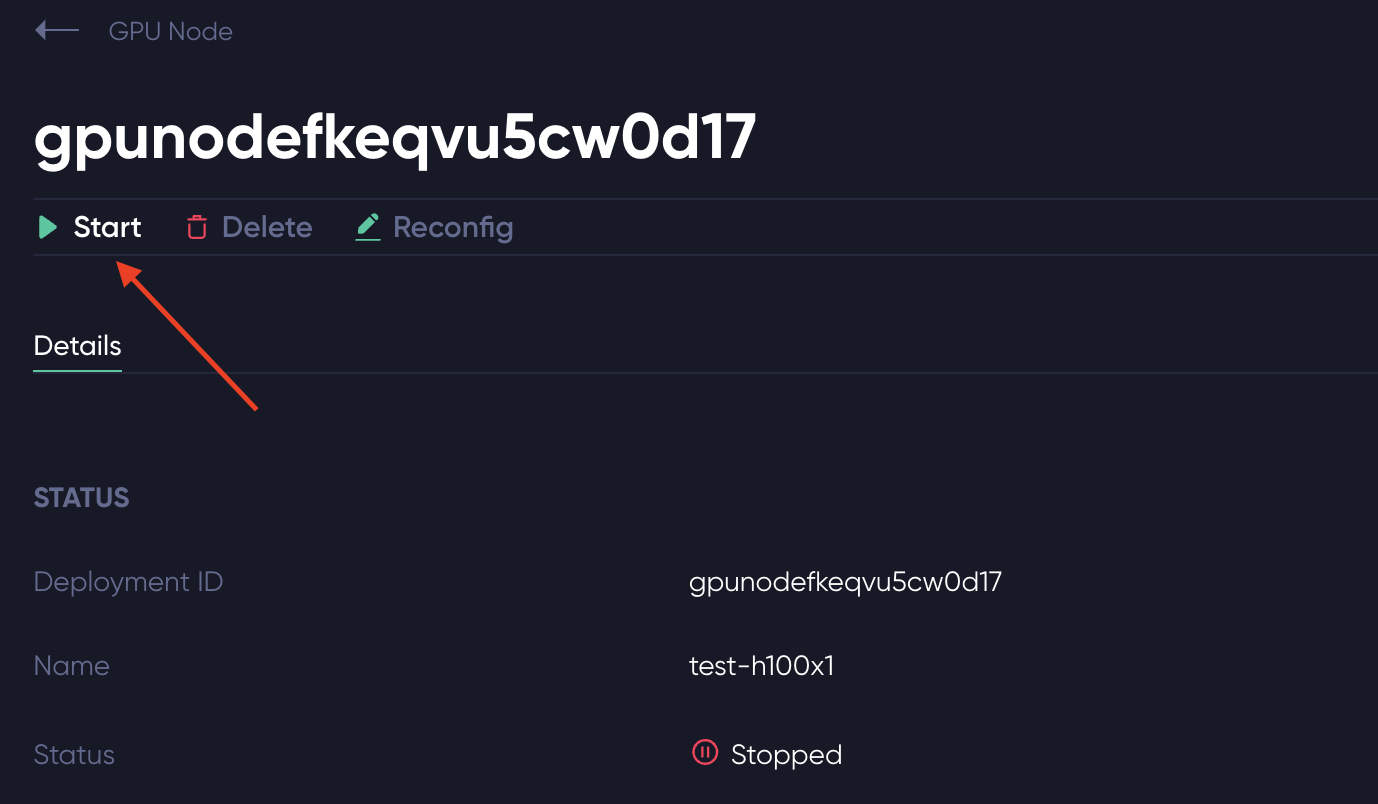
You can restart a stopped node either from the GPU node list page or the details page as shown below:

3. Reconfigure a GPU Node
You can reconfigure a GPU once it is stopped. You can navigate to the reconfiguration UI either from the GPU node list page or the details page.

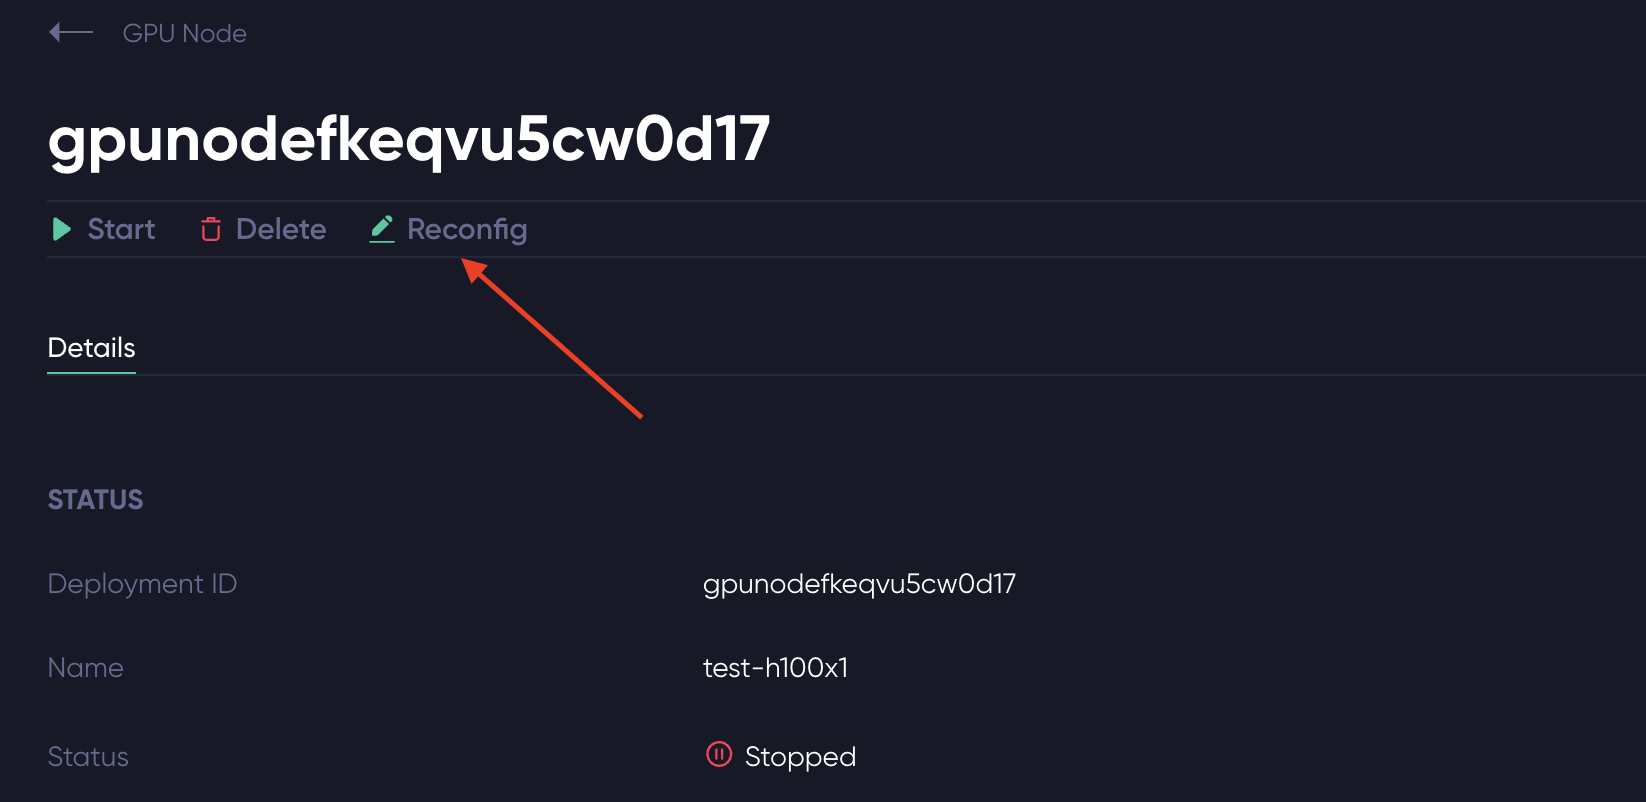
Once you click on the "Reconfigure" button, you should see the UI below, which allows you to
- Change the name of the GPU node.
- Change the machine type by choosing another available type of machine in the same region from the dropdown menu.
- Change the mounting point of an existing persistent volume.
- Attach more persistent volumes to the GPU node.
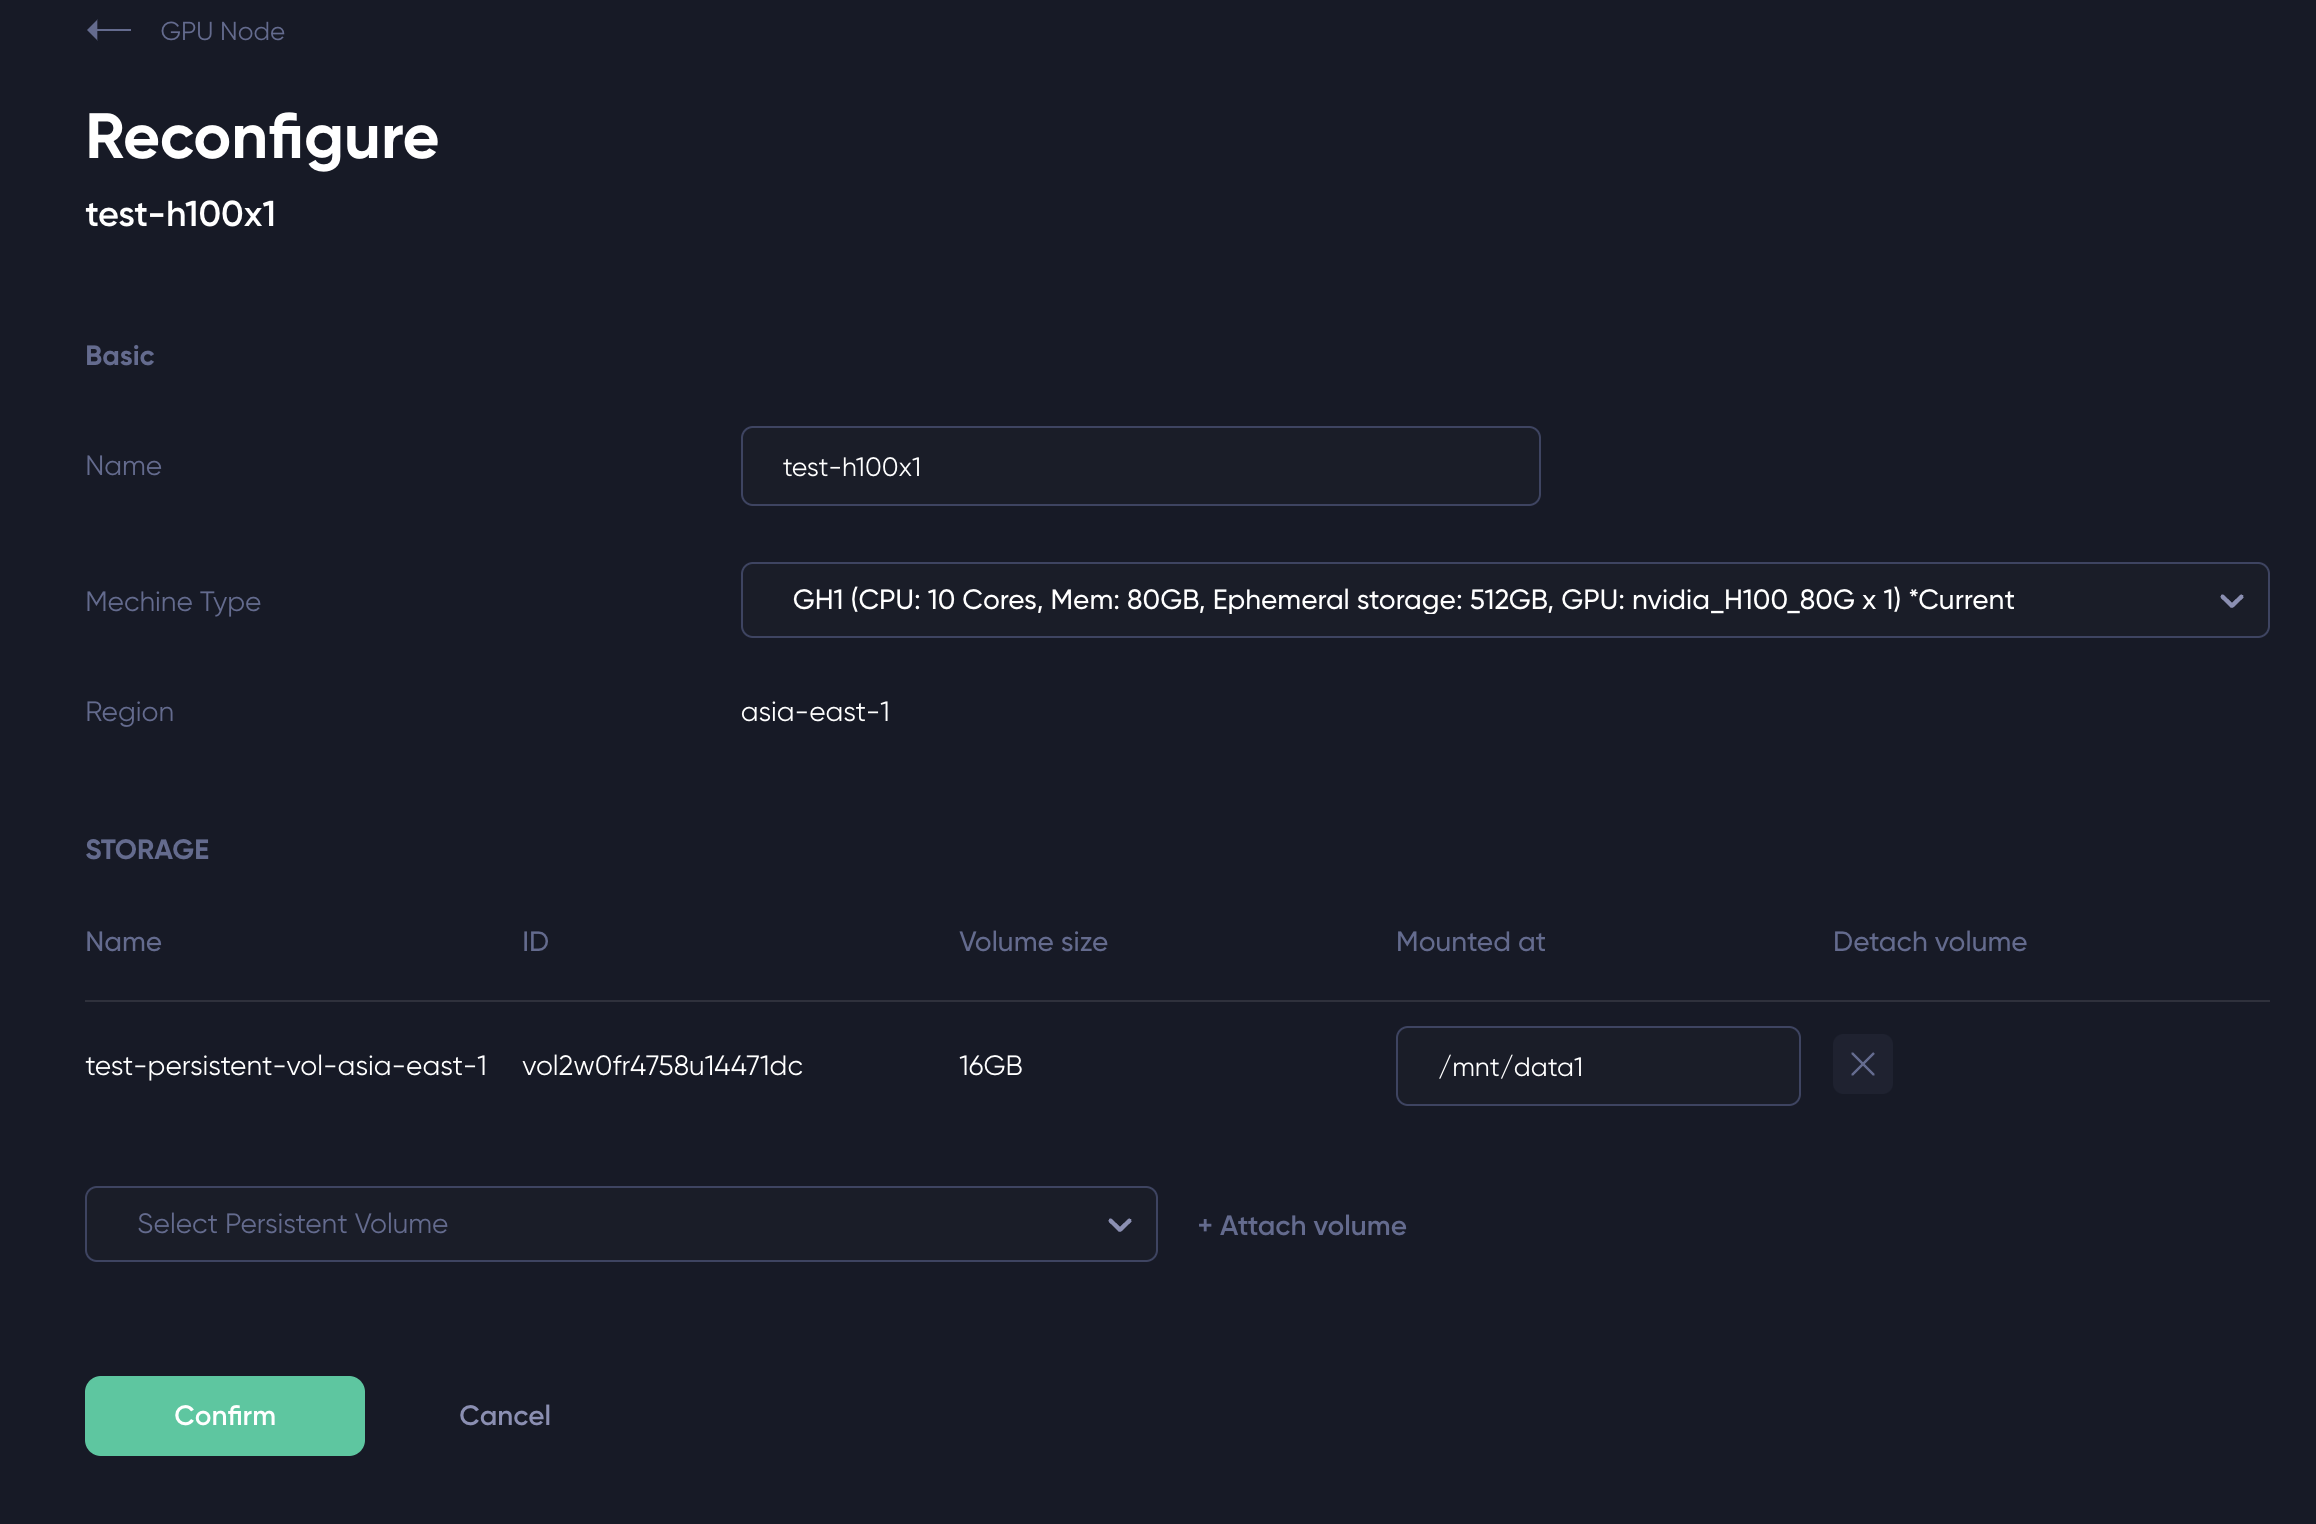
After making the configuration changes, simply click the "Confirm" button to save the changes, and you should be ready to start the node again!
Updated 3 months ago